Main toolbar
The Main toolbar is at the top right corner of the window. This panel contains controllers for the main operations under the elements (creation, deletion) and controllers with information about the system..

| Button | Description |
|---|---|
|
Appearance of the button depends on the last selected action in the dropdown list. Create object. It opens the pop-up window for adding a new child object to the current object. Create reference. It opens the pop-up window for creation a new reference to an object. Create backing. It opens the pop-up window for creation a new backing. Create link. It opens the pop-up window for creation a new link between two objects. Create flow. It opens the pop-up window for creation a new flow between several objects. |
|
Fullscreen. It activates browser fullscreen mode. In order to exit the fullscreen mode it suffices to click the button one more time or press F11. |
|
Elements deletion. It turns on the elements deletion mode. |
|
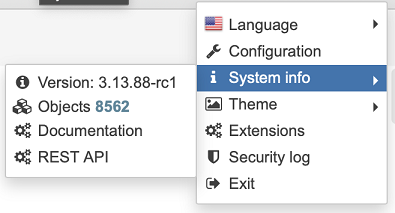
Current user. It shows the login of the current user. Clicking the button opens the dropdown menu described below. |
Current user menu

Language switches the language of the interface.
Configuration opens the window with administering settings of the system and users.
System info is a list, which contains:
-
Version | It displays the current server version;
-
Objects | It shows the total number of objects, which are available for the user;
-
Documentation is a link to the current version of the documentation. You can change it in the web application configuration;
-
REST API is the reference to the description of REST API methods of the system. You can change it in the web application configuration.
Theme switches the theme of the interface.
Extensions opens the list of installed extensions.
Security log – opens security log. This button isn’t available for all users by default. You can see how to enable this feature in the Enable security log article.
Exit logs the current user out.


