Keycloak integration
SAYMON provides the possibility of its users to authorize via Keycloak server.
Server setup
In order to set up the interaction between the SAYMON server and the external Keycloak server, it is necessary to obtain at least one of the parameters:
-
Realm Certificate, which is used by the Keycloak to sign the user tokens;
-
Backend-client configuration file.
| Setting up the client and obtaining parameters are implemented in the Keycloak Administration Console. |
Realm Certificate
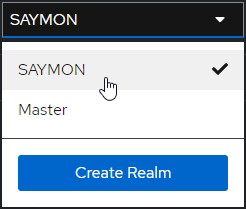
In order to obtain the Realm Certificate, it is necessary to:
-
Select the required realm from the list (SAYMON here):
-
In the Realm Settings section on the Tokens tab find the token signature algorithm (RS256 here):
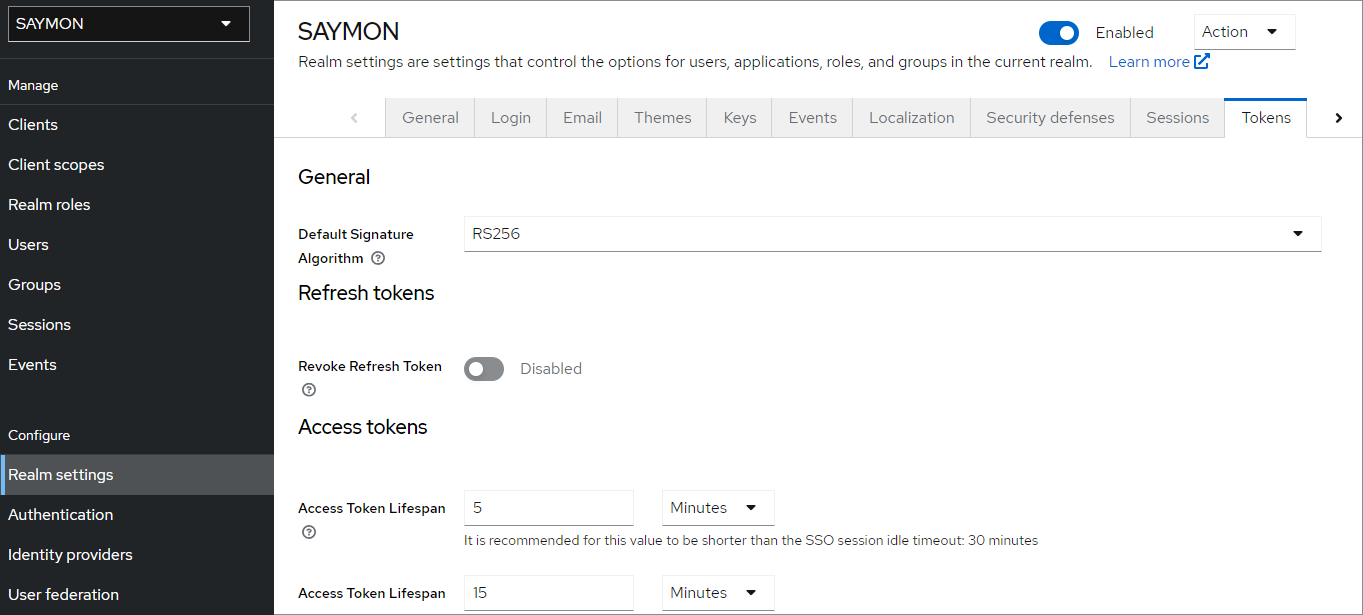
-
On the Keys tab find the certificate for the algorithm:
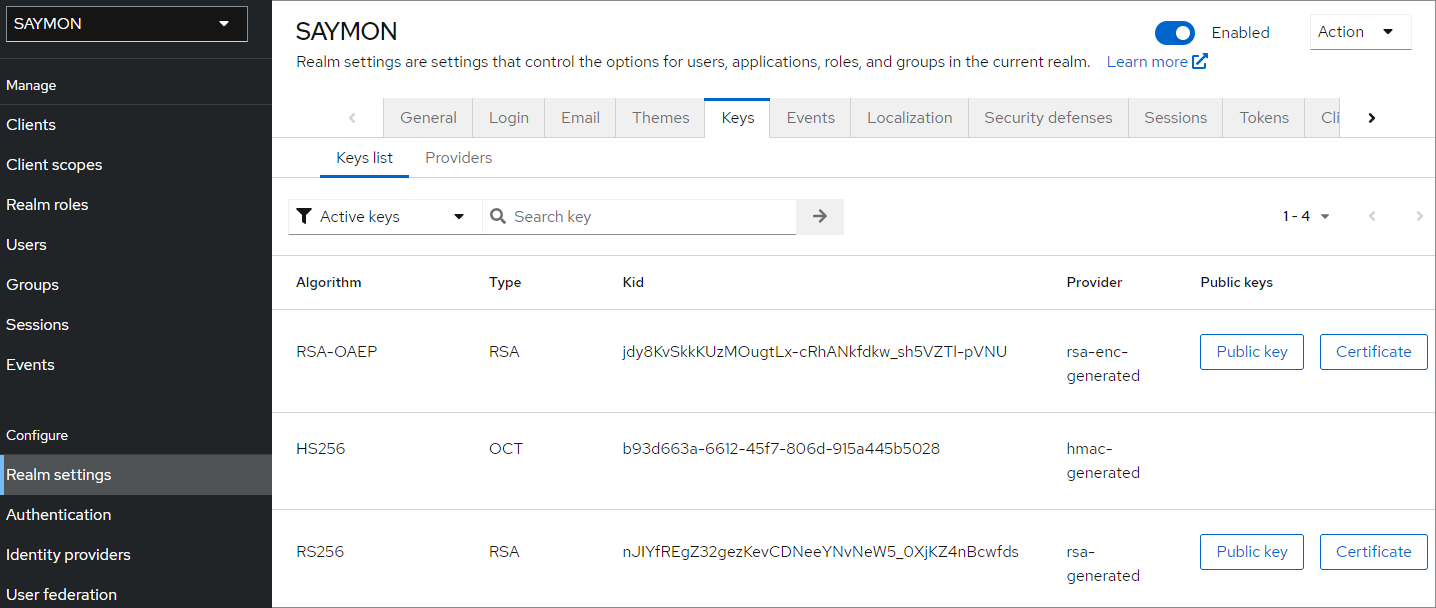
-
The
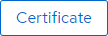 button in the corresponding line shows the certificate:
It is recommended to save the data to the keycloak_realm_certificate file.
Backend-client
Clients are connection parameters to the Keycloak server for external applications which authorize users.
The main feature of the Backend-client is its own authentication: this client gets confidential access with the secret key.
In order to set up the Backend-client, it is necessary to:
-
Select the required realm from the list (SAYMON here):
-
Click the
 button in the Clients section:
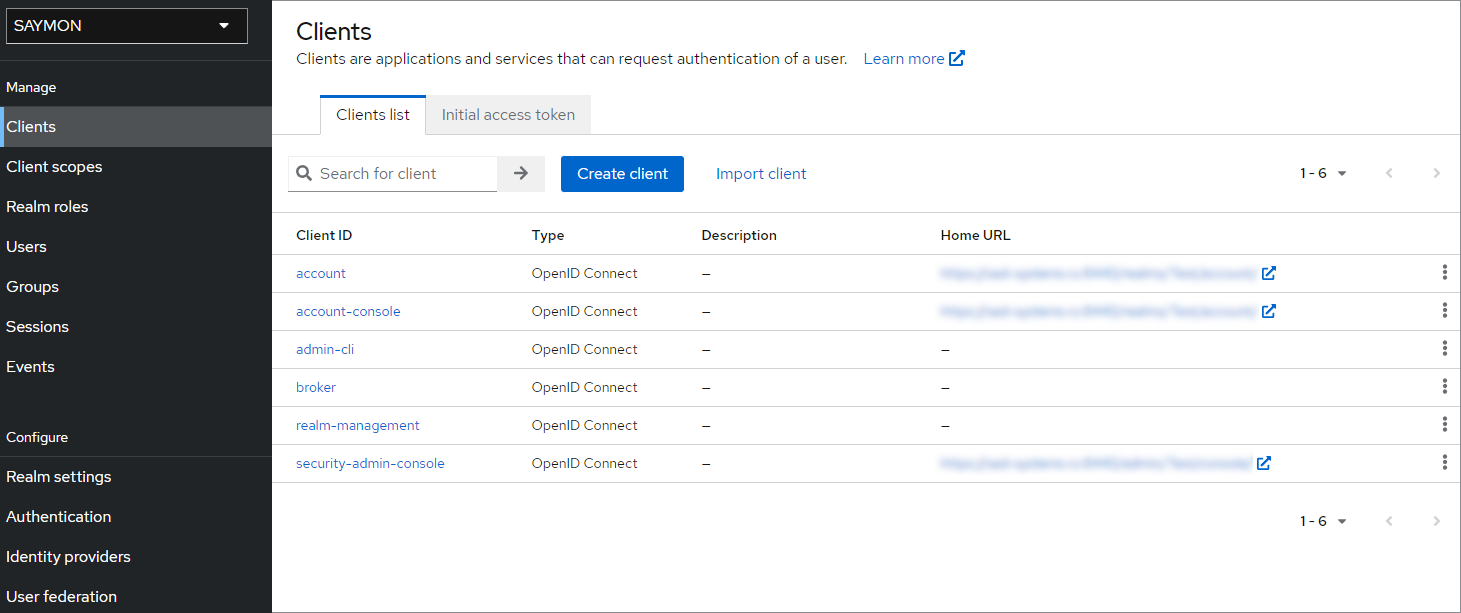
-
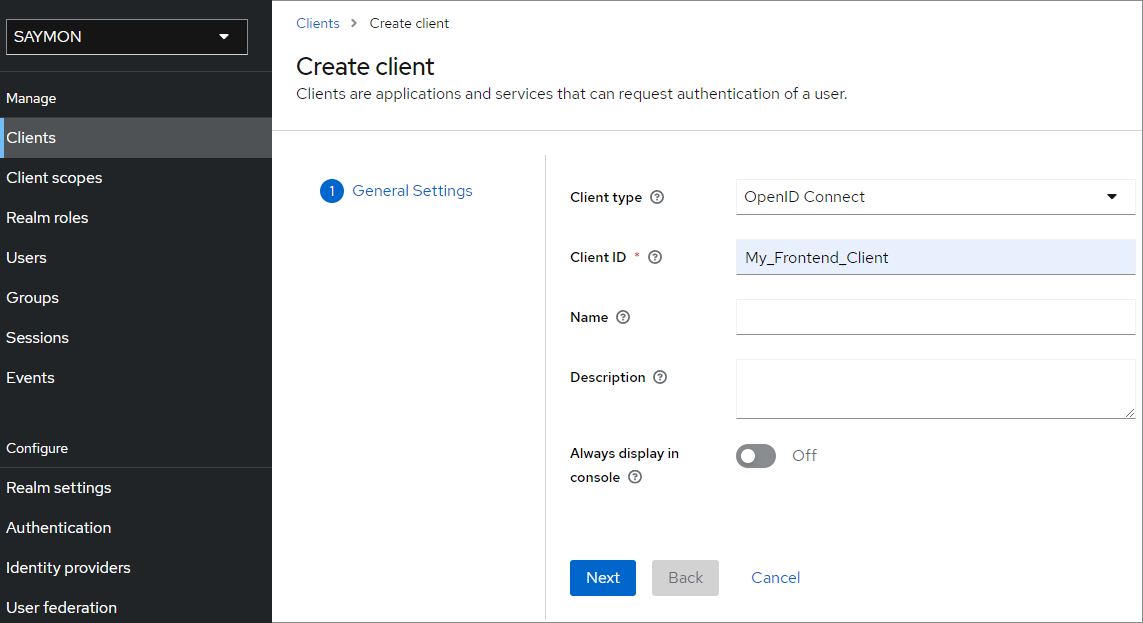
Enter the Backend-client’s name into the Client ID field:
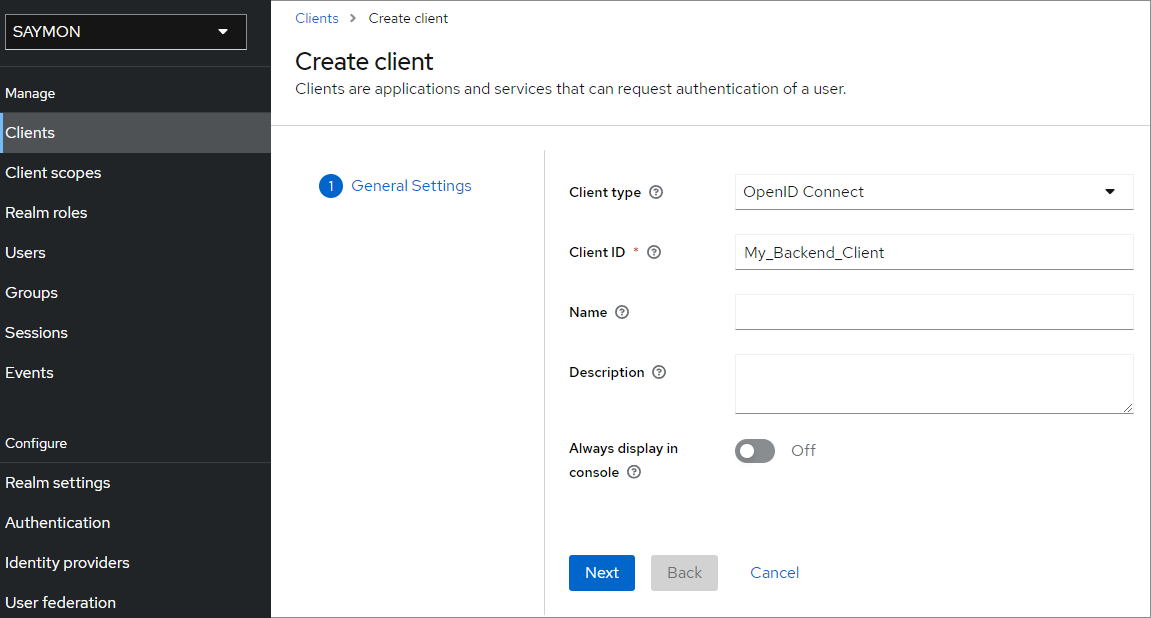
and click the
 button.
 -
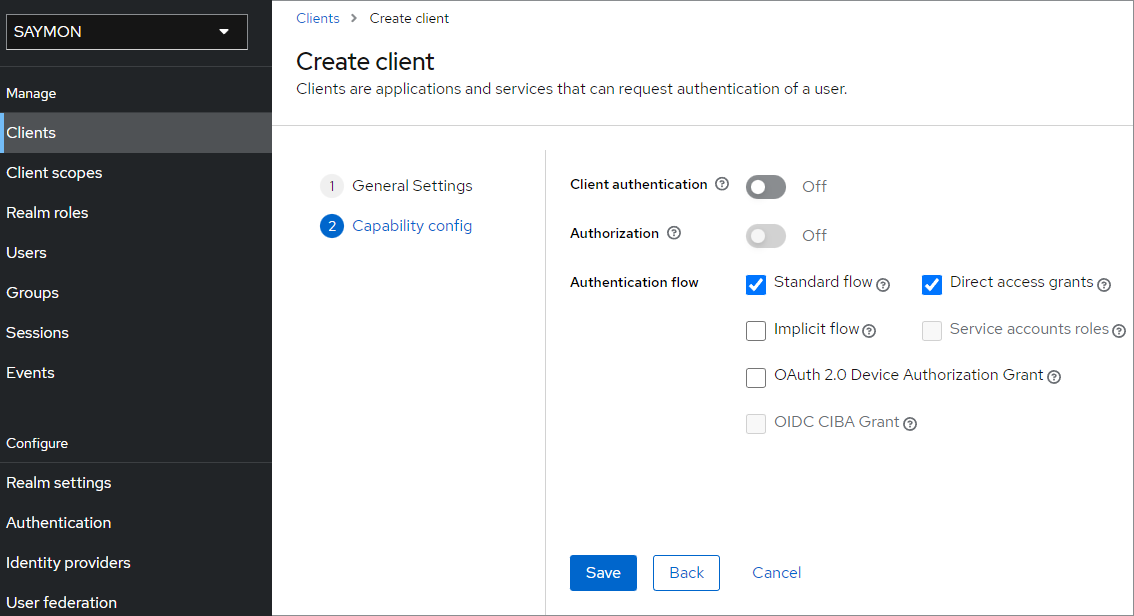
Set the Client authentication slider to the On position:
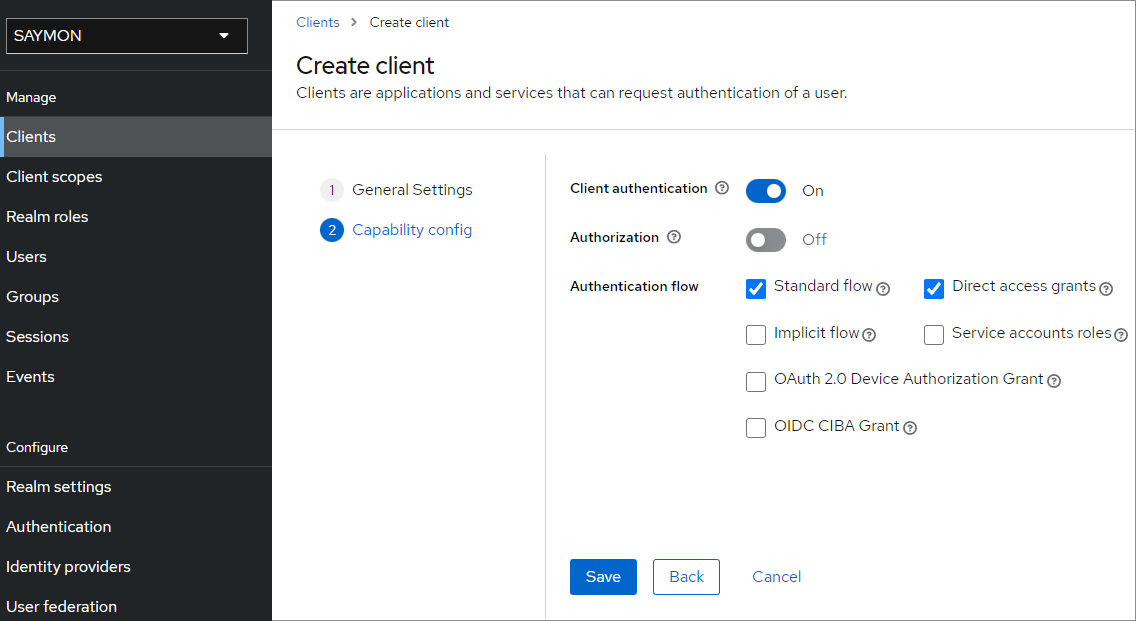
and click the
 button.
 -
Select Download adapter config in the Action menu:
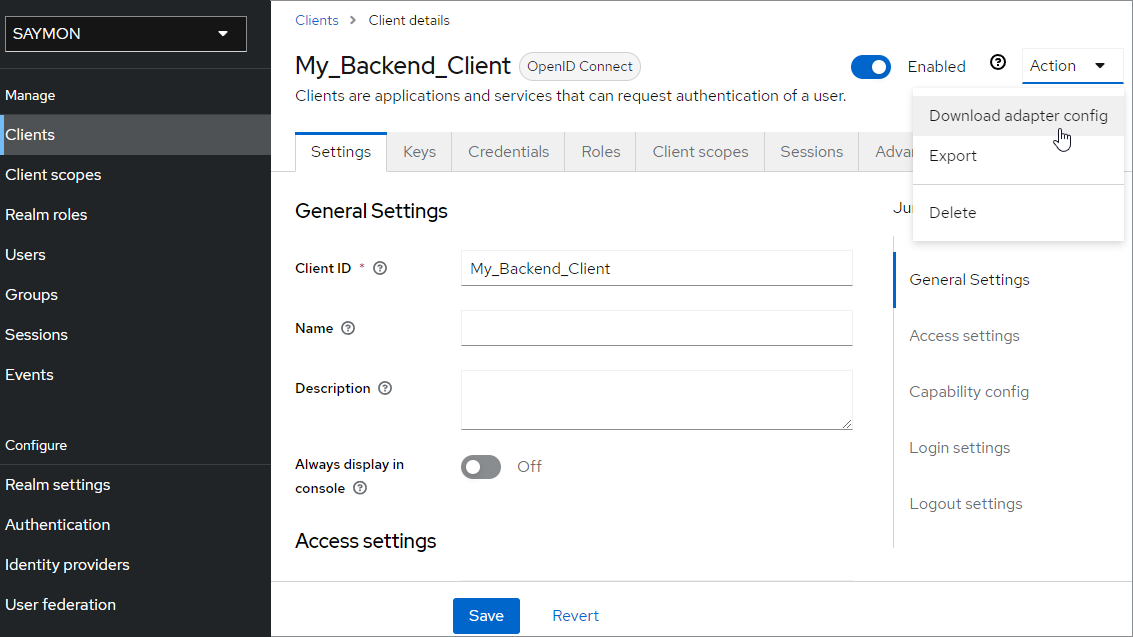
-
Click the
 button to obtain the Backend-client configuration file in the JSON format:
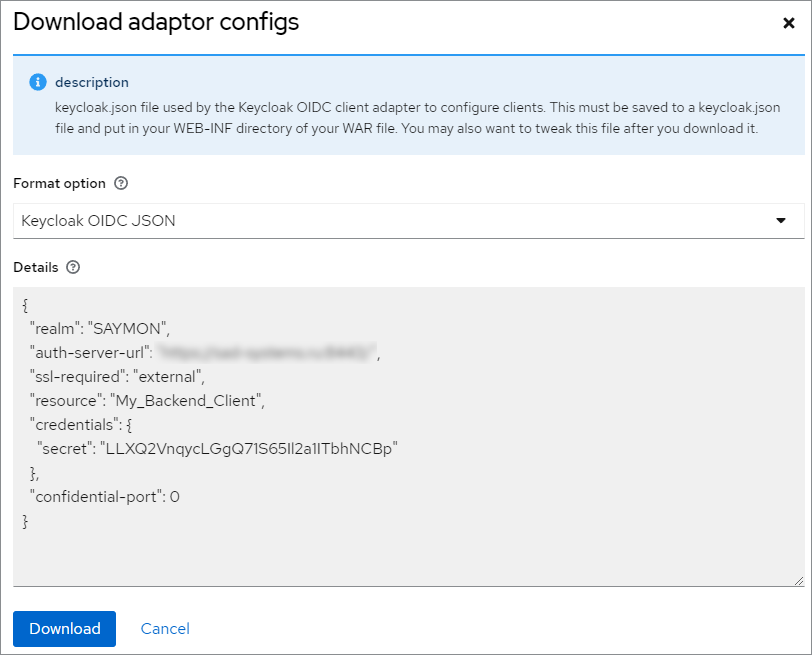
SAYMON Server configuring
In order to interact with the Keycloak server, on the SAYMON server it is necessary to:
-
Add the Keycloak section to the server configuration file
/etc/saymon/saymon-server.conf:"keycloak": { "realm_certificate": "<data from the keycloak_realm_certificate>", "realm_certificate_file": "/etc/saymon/keycloak_realm_certificate", "config_file": "/etc/saymon/keycloak_backend.json" }where
-
realm_certificate is the data from the Keycloak Realm Certificate;
-
realm_certificate_file is the path to the file with the Keycloak Realm Certificate;
-
config_file is the path to the configuration file, generated by the Keycloak server for the Backend-client.
The parameters are listed in descending order of priority when specified simultaneously. It is sufficient to specify one of the parameters in order to work with Keycloak.
-
-
Restart the saymon-server service:
$sudo service saymon-server restart
Web interface setup
In order to get the possibility to authorize users via Keycloak in the SAYMON web interface, it is necessary to obtain the Frontend-client configuration file.
| Setting up the client and obtaining the configuration file are implemented in the Keycloak Administration Console. |
Frontend-client
The main feature of the Frontend-client is the absence of its own authentication: this client gets public access.
In order to set up the Frontend-client, it is necessary to:
-
Select the required realm from the list (SAYMON here):
-
Click the
button in the Clients section: -
Enter the Frontend-client’s name into the Client ID field:
and click the
button. -
Set the Client authentication slider to the Off position:
and click the
button. -
On the Settings tab in the Access settings section specify the correct URI addresses, from which access to the Keycloak server will be implemented and to which users will be redirected after successful authentication and exit:
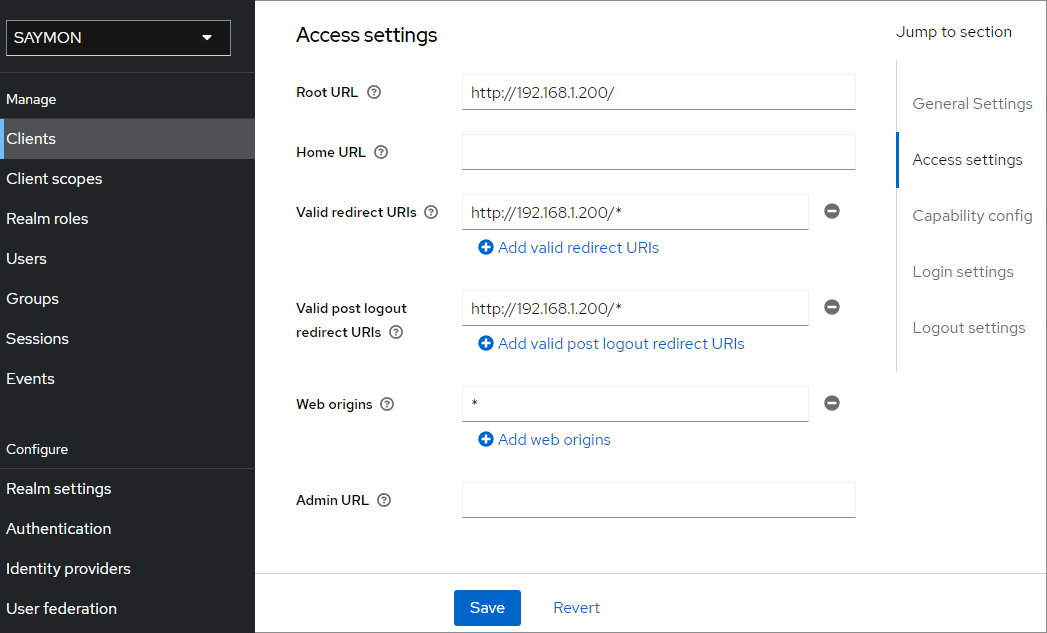
and click the
button. -
Select Download adapter config in the Action menu:

-
Click the
button to obtain the Frontend-client configuration file in the JSON format: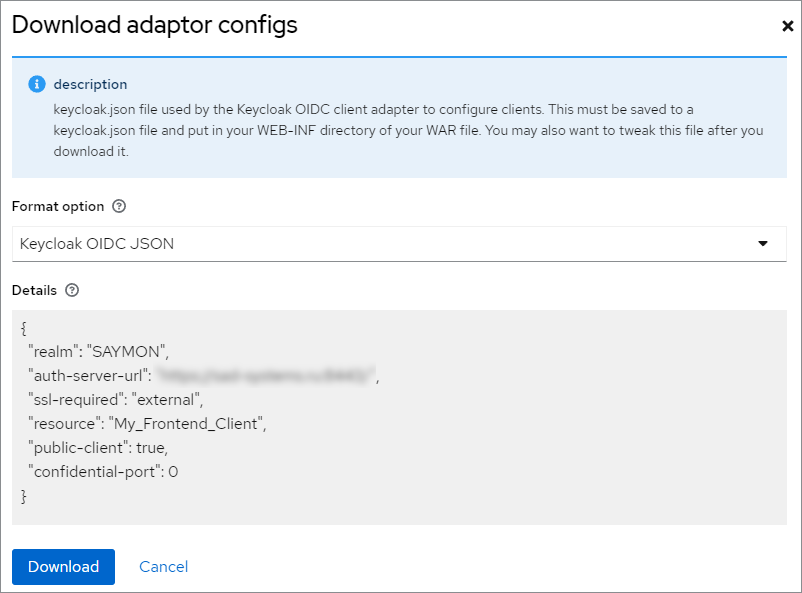
SAYMON web interface configuring
In order to activate the authorization via Keycloak in the system web interface, it is necessary to:
-
Add the Authentication section to the SAYMON client configuration file
/etc/saymon/saymon-client.yaml:authentication: availableMethods: - "native" - "keycloak" methodByDefault: "keycloak" services: keycloak: configUri: keycloak_frontend.jsonwhere
-
availableMethods is the list of available authentication methods for users;
-
methodByDefault is the authentication method offered to the user when displaying of the authentication form;
-
configUri is the configuration file generated by the Keycloak server for the Frontend-client.
The Frontend-client configuration file must be placed to the /etc/saymonfolder.
-
-
Reload the SAYMON page in the web browser.