Installation of Self-Signed SSL Certificate
| Since a self-signed certificate is not signed by any of the trusted CAs included with browsers, it cannot be used to authenticate the server. |
To install a self-signed SSL certificate, do the following:
-
Generate an SSL certificate.
-
Configure Nginx to use a self-signed SSL certificate.
-
Install a self-signed SSL certificate.
Generating an SSL certificate
TLS/SSL requires a pair of public certificate and private key. The private key is stored on the server and encrypts content sent to clients, and the SSL certificate is available to all users who connect to the server. It is used to decrypt the content signed with the associated SSL key.
To generate certificate files, use the following command:
sudo openssl req -x509 -nodes -days 365 -newkey rsa:2048 -keyout /etc/ssl/private/nginx-selfsigned.key -out /etc/ssl/certs/nginx-selfsigned.crt| When you create an SSL certificate, you also create a key file that allows the server to securely process encrypted data. |
where:
-
opensslis a command line tool used for creation and management of certificates, keys, and other OpenSSL files -
req -x509defines the management of requests for signing X.509 certificates (CSRs); -
-nodesinstructs to skip protection of the certificate with a passphrase after the server is restarted -
-days 365sets the validity period of the certificate to 1 year. Many browsers will not accept certificates that are older than the specified period; -
-newkey rsa:2048instructs to generate a new certificate and a new key at the same time; thersa:2048part instructs to create an RSA key with a length of 2048 bits; -
-keyoutdefines the location to store the generated private key file;
After you enter the command, a series of questions appear asking you to enter the necessary information.
In the Common Name line, you need to enter the hostname or public IP address that will be used to access the server. The specified value must match the phrase that the user will enter in the browser’s address bar.
The full list of dialogues requesting the necessary information will look the following way:
Country Name (2 letter code) [XX]:US
State or Province Name (full name) []:Example
Locality Name (eg, city) [Default City]:Example
Organization Name (eg, company) [Default Company Ltd]:Example Inc
Organizational Unit Name (eg, section) []:Example Dept
Common Name (eg, your name or your server's hostname) []:your_domain_or_ip
Email Address []:admin@example.com
The generated files will be stored in the appropriate subfolders in the /etc/ssl folder (paths to subfolders are specified using the -keyout and -out options).
To create a PFS key, use the following command:
sudo openssl dhparam -out /etc/nginx/dhparam.pem 4096This process may take a few minutes. Once created, the key will be saved to /etc/nginx.
Configuring Nginx to Use a Self-signed SSL Certificate
After creating the key and certificate, you need to edit the configuration of the Nginx server. For this, do the following:
-
Specify the location of the key and SSL certificate files.
-
Configure SSL settings.
-
Set up Nginx to Support SSL.
-
Adjust the firewall.
-
Implement changes to the Nginx configuration.
-
Test encryption.
Specifying the location of the key and SSL certificate files
Create a new Nginx configuration snippet in the /etc/nginx/snippets directory:
sudo nano /etc/nginx/snippets/self-signed.confAdd the following directives to the certificate file: the ssl_certificate directive, which specifies the path to the certificate, and the ssl_certificate_key directive, which specifies the path to the private key:
ssl_certificate /etc/ssl/certs/nginx-selfsigned.crt;
ssl_certificate_key /etc/ssl/private/nginx-selfsigned.key;
Save changes and close the file.
Configuring SSL settings
Create another snippet that will define some SSL settings:
sudo nano /etc/nginx/snippets/ssl-params.confCopy the following code to ssl-params.conf:
ssl_protocols TLSv1.2;
ssl_prefer_server_ciphers on;
ssl_dhparam /etc/nginx/dhparam.pem;
ssl_ciphers ECDHE-RSA-AES256-GCM-SHA512:DHE-RSA-AES256-GCM-SHA512:ECDHE-RSA-AES256-GCM-SHA384:DHE-RSA-AES256-GCM-SHA384:ECDHE-RSA-AES256-SHA384;
ssl_ecdh_curve secp384r1; # Requires nginx >= 1.1.0
ssl_session_timeout  10m;
ssl_session_cache shared:SSL:10m;
ssl_session_tickets off; # Requires nginx >= 1.5.9
ssl_stapling on; # Requires nginx >= 1.3.7
ssl_stapling_verify on; # Requires nginx => 1.3.7
resolver 8.8.8.8 8.8.4.4 valid=300s;
resolver_timeout 5s;
# Disable strict transport security for now. You can uncomment the following
# line if you understand the implications.
# add_header Strict-Transport-Security "max-age=63072000; includeSubDomains; preload";
add_header X-Frame-Options DENY;
add_header X-Content-Type-Options nosniff;
add_header X-XSS-Protection "1; mode=block";
Save changes and close the file.
Set up Nginx to support SSL
Back up the current configuration of the Nginx server:
sudo cp /etc/nginx/sites/your_domain /etc/nginx/sites/your_domain.bakOpen the file to make changes:
sudo nano /etc/nginx/sites/your_domainYou need to update the listen directives and include the SSL snippets. You need to configure the block to support SSL traffic on port 443 and then create a new server block to handle traffic on port 80 and automatically forward traffic to port 443.
In the current file, update the listen directives to support port 443 and ssl, and then add two snippet files: self-signed.conf and ssl-params.conf.
server {
    listen 443 ssl;
    listen [::]:443 ssl;
    include snippets/self-signed.conf;
    include snippets/ssl-params.conf;

root /var/www/your_domain/html;
        index index.html index.htm index.nginx-debian.html;

  server_name your_domain.com www.your_domain.com;

  location / {
                try_files $uri $uri/ =404;
        }
}
Add a second server block (after the closing brace (}) of the first block):
server {
    listen 80;
    listen [::]:80;

    server_name your_domain.com www.your_domain.com;

    return 302 https://$server_name$request_uri;
}
This will allow you to listen on port 80 and redirect traffic to HTTPS.
Save changes and close the file.
Adjusting the firewall
If you use a firewall (for example, ufw), you’ll need to adjust the settings to allow for SSL traffic.
During installation Nginx registers a few profiles with ufw.
To see the available profiles, use the following command:
sudo ufw app listIt should look like this:
Available applications:
  Nginx Full
  Nginx HTTP
  Nginx HTTPS
  OpenSSH
To verify current settings, use the following command:
sudo ufw statusProbably only HTTP traffic is allowed to the web server. The output should look like this:
Status: active

To                         Action      From
--                         ------      ----
OpenSSH                    ALLOW       Anywhere
Nginx HTTP                 ALLOW       Anywhere
OpenSSH (v6)               ALLOW       Anywhere (v6)
Nginx HTTP (v6)            ALLOW       Anywhere (v6)
To let in HTTPS traffic, you need to allow the “Nginx Full” profile and then delete the “Nginx HTTP” profile allowance:
sudo ufw allow 'Nginx Full'
sudo ufw delete allow 'Nginx HTTP'
Run the sudo ufw status command and verify that the firewall configuration is complete:
Status: active

To                         Action      From
--                         ------      ----
OpenSSH                    ALLOW       Anywhere
Nginx Full                 ALLOW       Anywhere
OpenSSH (v6)               ALLOW       Anywhere (v6)
Nginx Full (v6)            ALLOW       Anywhere (v6)
Implementing changes to the Nginx configuration
After you adjusted the firewall, you need to restart Nginx for the changes to take effect.
Run the following command to make sure there are no syntax errors in the files:
sudo nginx -tIf everything is successful, you will get a result that looks like this:
nginx: [warn] "ssl_stapling" ignored, issuer certificate not found for certificate "/etc/ssl/certs/nginx-selfsigned.crt"
nginx: the configuration file /etc/nginx/nginx.conf syntax is ok
nginx: configuration file /etc/nginx/nginx.conf test is successful
After that, you can restart Nginx to implement the changes:
sudo systemctl restart nginxTesting encryption
Connect to the web server of the SAYMON server using the prefix https:// in the address bar of your browser.
Since the certificate is not signed by a trusted certificate authority known to browsers and operating systems, the browser will display a security warning saying that it cannot authenticate the server.
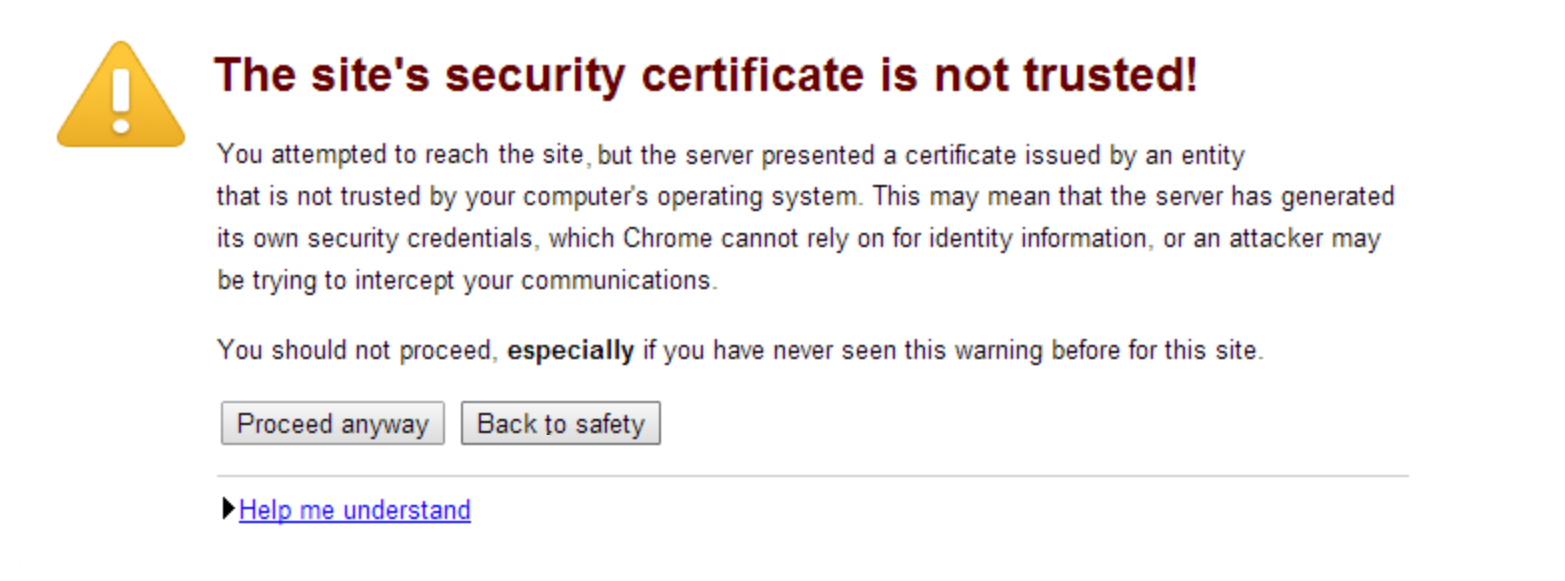
To load the page, click Advanced or Continue.
| If the browser cannot connect to the server, make sure that the firewall is not blocking the connection. |
Installing self-signed SSL certificates
To remove the security warning, you should add the self-signed certificate to the system’s trusted certificate store or the browser’s certificate store.
To add a self-signed certificate to the system trusted certificate store, do the following:
Copy the certificate to a separate folder (for example: /usr/local/share/ca-certificates):
cp ./ca.crt /usr/local/share/ca-certificates/losstca.crtRun the following command:
sudo update-ca-certificatesVerify that the system trusts the certificate:
curl -I https://localhost| Some browsers (such as Firefox and Google Chrome) have their own certificate stores and do not use the system store. Therefore, you need to import a self-signed certificate into such browsers manually. |
To import a self-signed certificate into the browser’s certificate store, do the following:
Importing SSL certificate using GUI into Google Chrome
-
In your browser settings, go to Privacy and Security → Security → Device Certificate Management.
-
In the dialog window, open the Trusted Root Certification Authorities tab.
-
Press the Import button and select the root certificate file.
-
Specify the desired trust settings.
The certificate will be imported into the browser’s certificate store.
Importing a certificate in the terminal using the certutil utility
To work with certificates, you need the libnss3-tools package. Use the following command to install the package:
sudo apt install libnss3-toolsThe Google Chrome certificate database is located in the ~/.pki/nssdb folder. To view the available certificates, use the following command:
certutil -d ~/.pki/nssdb -LThe command for adding a certificate is as follows:
$ certutil -d path/to/database -A -t "trust_settings" -n "name" -i "/path/to/file"There are three groups of trust attributes:
-
for SSL;
-
for Email;
-
for software and other objects.
Each of these groups can contain the following attributes:
-
p — valid peer
-
P — trusted peer
-
c — valid certification authority
-
C — trusted certification authority
-
T — trusted certification authority for client authorization
For SSL certificates use the following sequence "TC,,". The complete command to import ca.crt will look as follows:
certutil -d sql:~/.pki/nssdb -A -t "TC,," -n "Losst CA" -i ./ca.crtTo view the list of certificates, you can use the following command:
certutil -d sql:~/.pki/nssdb -L