Zabbix integration
It is possible to connect to Zabbix servers and import information about monitored hosts.
Setting up a connection to Zabbix 5.x
To set up a connection, perform the following steps:
Step 1: check a connection from the system server to the Zabbix server
To check availability of Zabbix API the following command to be run in the command line of the system, having replaced http://192.168.1.215 with your Zabbix installation file api_jsonrpc.php address:
$curl -H "Content-Type: application/json" -X POST -d '{"jsonrpc":"2.0","method":"apiinfo.version","id":1,"auth":null,"params":{}}' http://192.168.1.215/zabbix/api_jsonrpc.phpIf the Zabbix server is available, it will reply with a message like this:
{"jsonrpc":"2.0","result":"3.2.1","id":1}Step 2: add a user to Zabbix
Add a new user to Zabbix with access to read the hosts or groups of hosts, the data from which need to be imported. The user’s login and password are required to connect to the Zabbix server on the 4th step.
Step 3: create an object for import
On the server of the system create the object, which the data will be imported into. In the Parameters section copy the ID of the object – it will be required on the 4th step.
Step 4: enable import on the system server
Open the server configuration file /etc/saymon/saymon-server.conf and add the following block to it:
"zabbix" : [{
    "url" : "http://192.168.1.215/zabbix/api_jsonrpc.php",
    "user" : "saymon",
    "password" : "saymon_user_password",
    "parent_id" : "58b586d5c3a2f96642e25537",
    "zabbix5": true
}]
where
-
url – address of the file
api_jsonrpc.phpof your Zabbix installation which has been checked on the 1st step, for examplehttp://192.168.1.215/zabbix/api_jsonrpc.php; -
user – login of the Zabbix user which has been created on the 2nd step;
-
password – password of the Zabbix user which has been created on the 2nd step;
-
parent_id – ID of the object which has been created on the 3rd step,
-
zabbix5 – enable Zabbix 5.x support.
In order to use another Zabbix installation add another JSON document with connection parameters as follows:
"zabbix" : [
    {
        "url" : "http://192.168.1.215/zabbix/api_jsonrpc.php",
        "user" : "saymon",
        "password" : "saymon_user_password",
        "parent_id" : "58b586d5c3a2f96642e12345",
        "zabbix5": true
    },
    {
        "url" : "http://192.168.1.180:8020/zabbix/api_jsonrpc.php",
        "user" : "saymon",
        "password" : "saymon_user_password",
        "parent_id" : "58b586d5c3a2f966427abcde",
        "zabbix5": true
    }
]Setting up a connection to Zabbix 6.0
| SAYMON server has Zabbix 6.0 support starting from 3.14.89 version. Earlier versions support only Zabbix 5.x. |
| The following guide uses Zabbix 6.0 in Docker container. |
Do the following steps to set up Zabbix 6.0 integration:
Step 1: start Zabbix
-
Clone Zabbix repository:
git clone https://github.com/zabbix/zabbix-docker -
Select a Docker file from the cloned repository:
docker-compose -f ./docker-compose_v3_alpine_mysql_latest.yaml up -d
Step 2: set up automatic Zabbix launch
To automatically launch containers on server restart, create systemd-unit that will launch docker-compose file when you start the server. Create the /etc/systemd/system/zabbix-compose.service file and paste the following into it:
[Unit]
Description=Zabbix services with docker-compose
Requires=docker.service
After=docker.service

[Service]
WorkingDirectory=/opt/zabbix-docker/
User=root
Group=docker
Type=oneshot
RemainAfterExit=yes

ExecStartPre=/usr/local/bin/docker-compose -f ./docker-compose_v3_alpine_mysql_latest.yaml down -v

# Compose up
ExecStart=/usr/local/bin/docker-compose -f ./docker-compose_v3_alpine_mysql_latest.yaml up -d

# Compose down, remove containers
ExecStop=/usr/local/bin/docker-compose -f ./docker-compose_v3_alpine_mysql_latest.yaml down

[Install]
WantedBy=multi-user.target
Execute the following commands to apply changes:
$systemctl enable zabbix-compose.service

$systemctl daemon-reload

$systemctl start zabbix-compose.service
Step 3: download and start Zabbix Agent
Download and install Zabbix Agent.
Use the following commands to work with Zabbix Agent.
Edit configuration files:
$sudo nano /etc/zabbix/zabbix_agentd.confStart Zabbix Agent service:
$sudo systemctl start zabbix-agentCheck service status:
$sudo systemctl status zabbix-agentStop service:
$sudo systemctl stop zabbix-agentStep 4: connect to Zabbix Agent
-
Log into the Zabbix server web interface (http://host/zabbix).
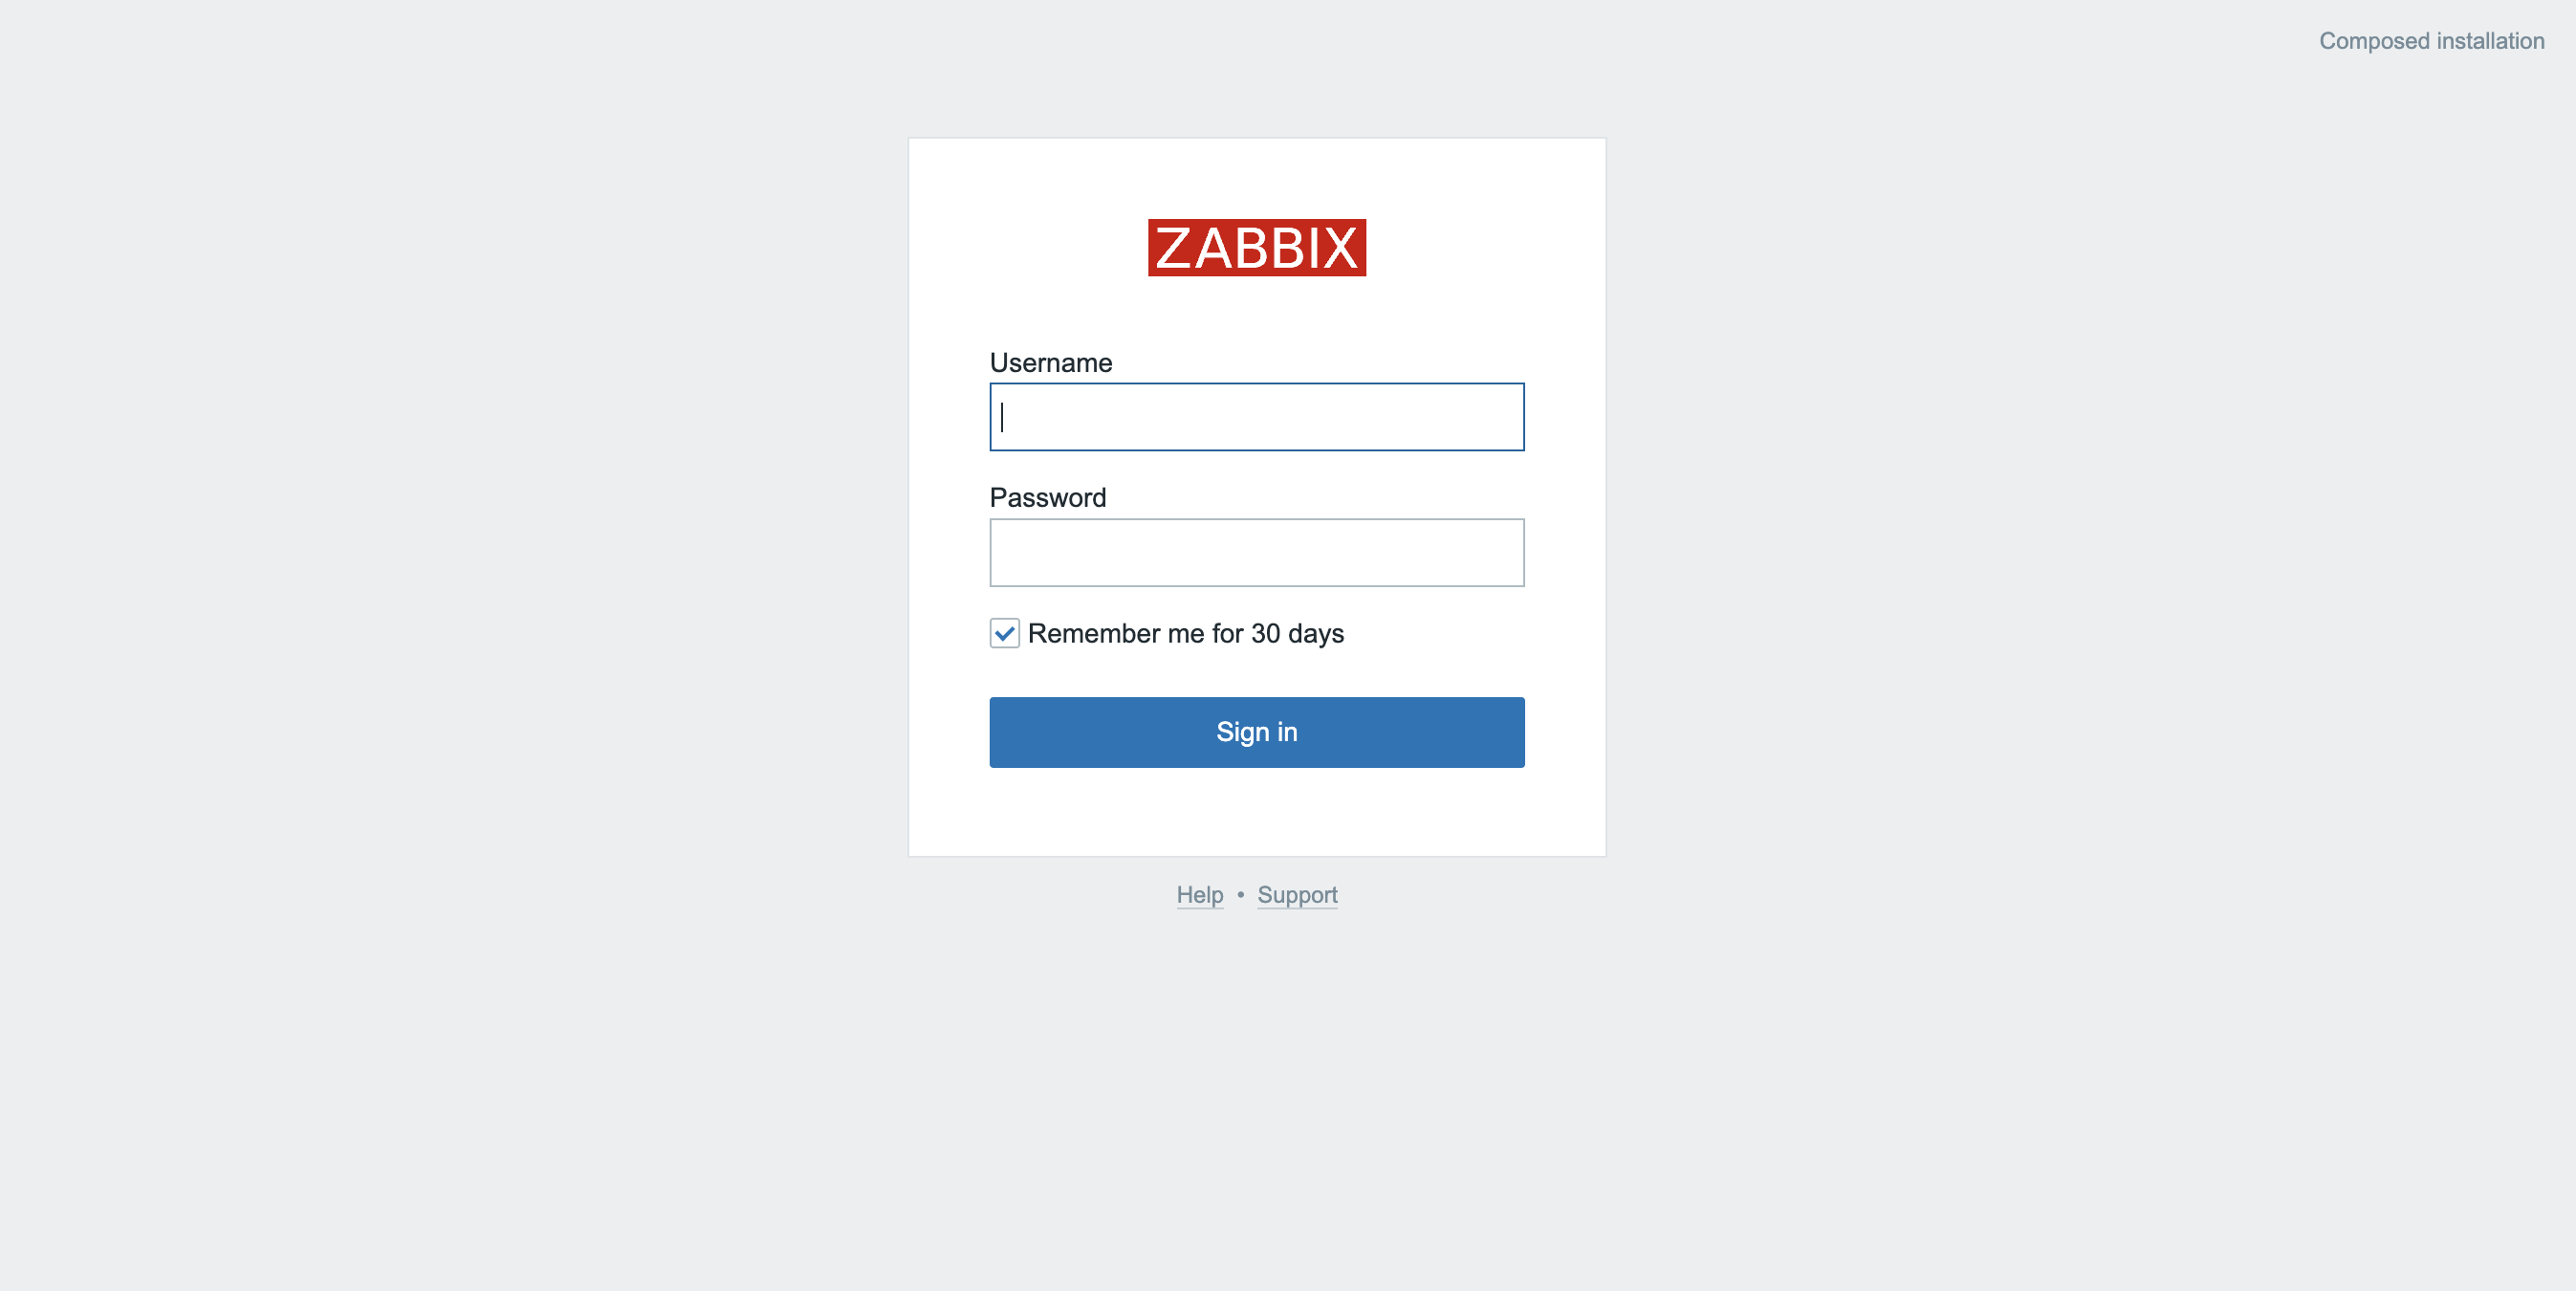
Default credentials:
Login: Admin
Password: zabbix
-
Specify the installation path of the Zabbix Agent. For this, perform the following steps:
In the side menu, select Monitoring, then press the Create host button in the top right corner.
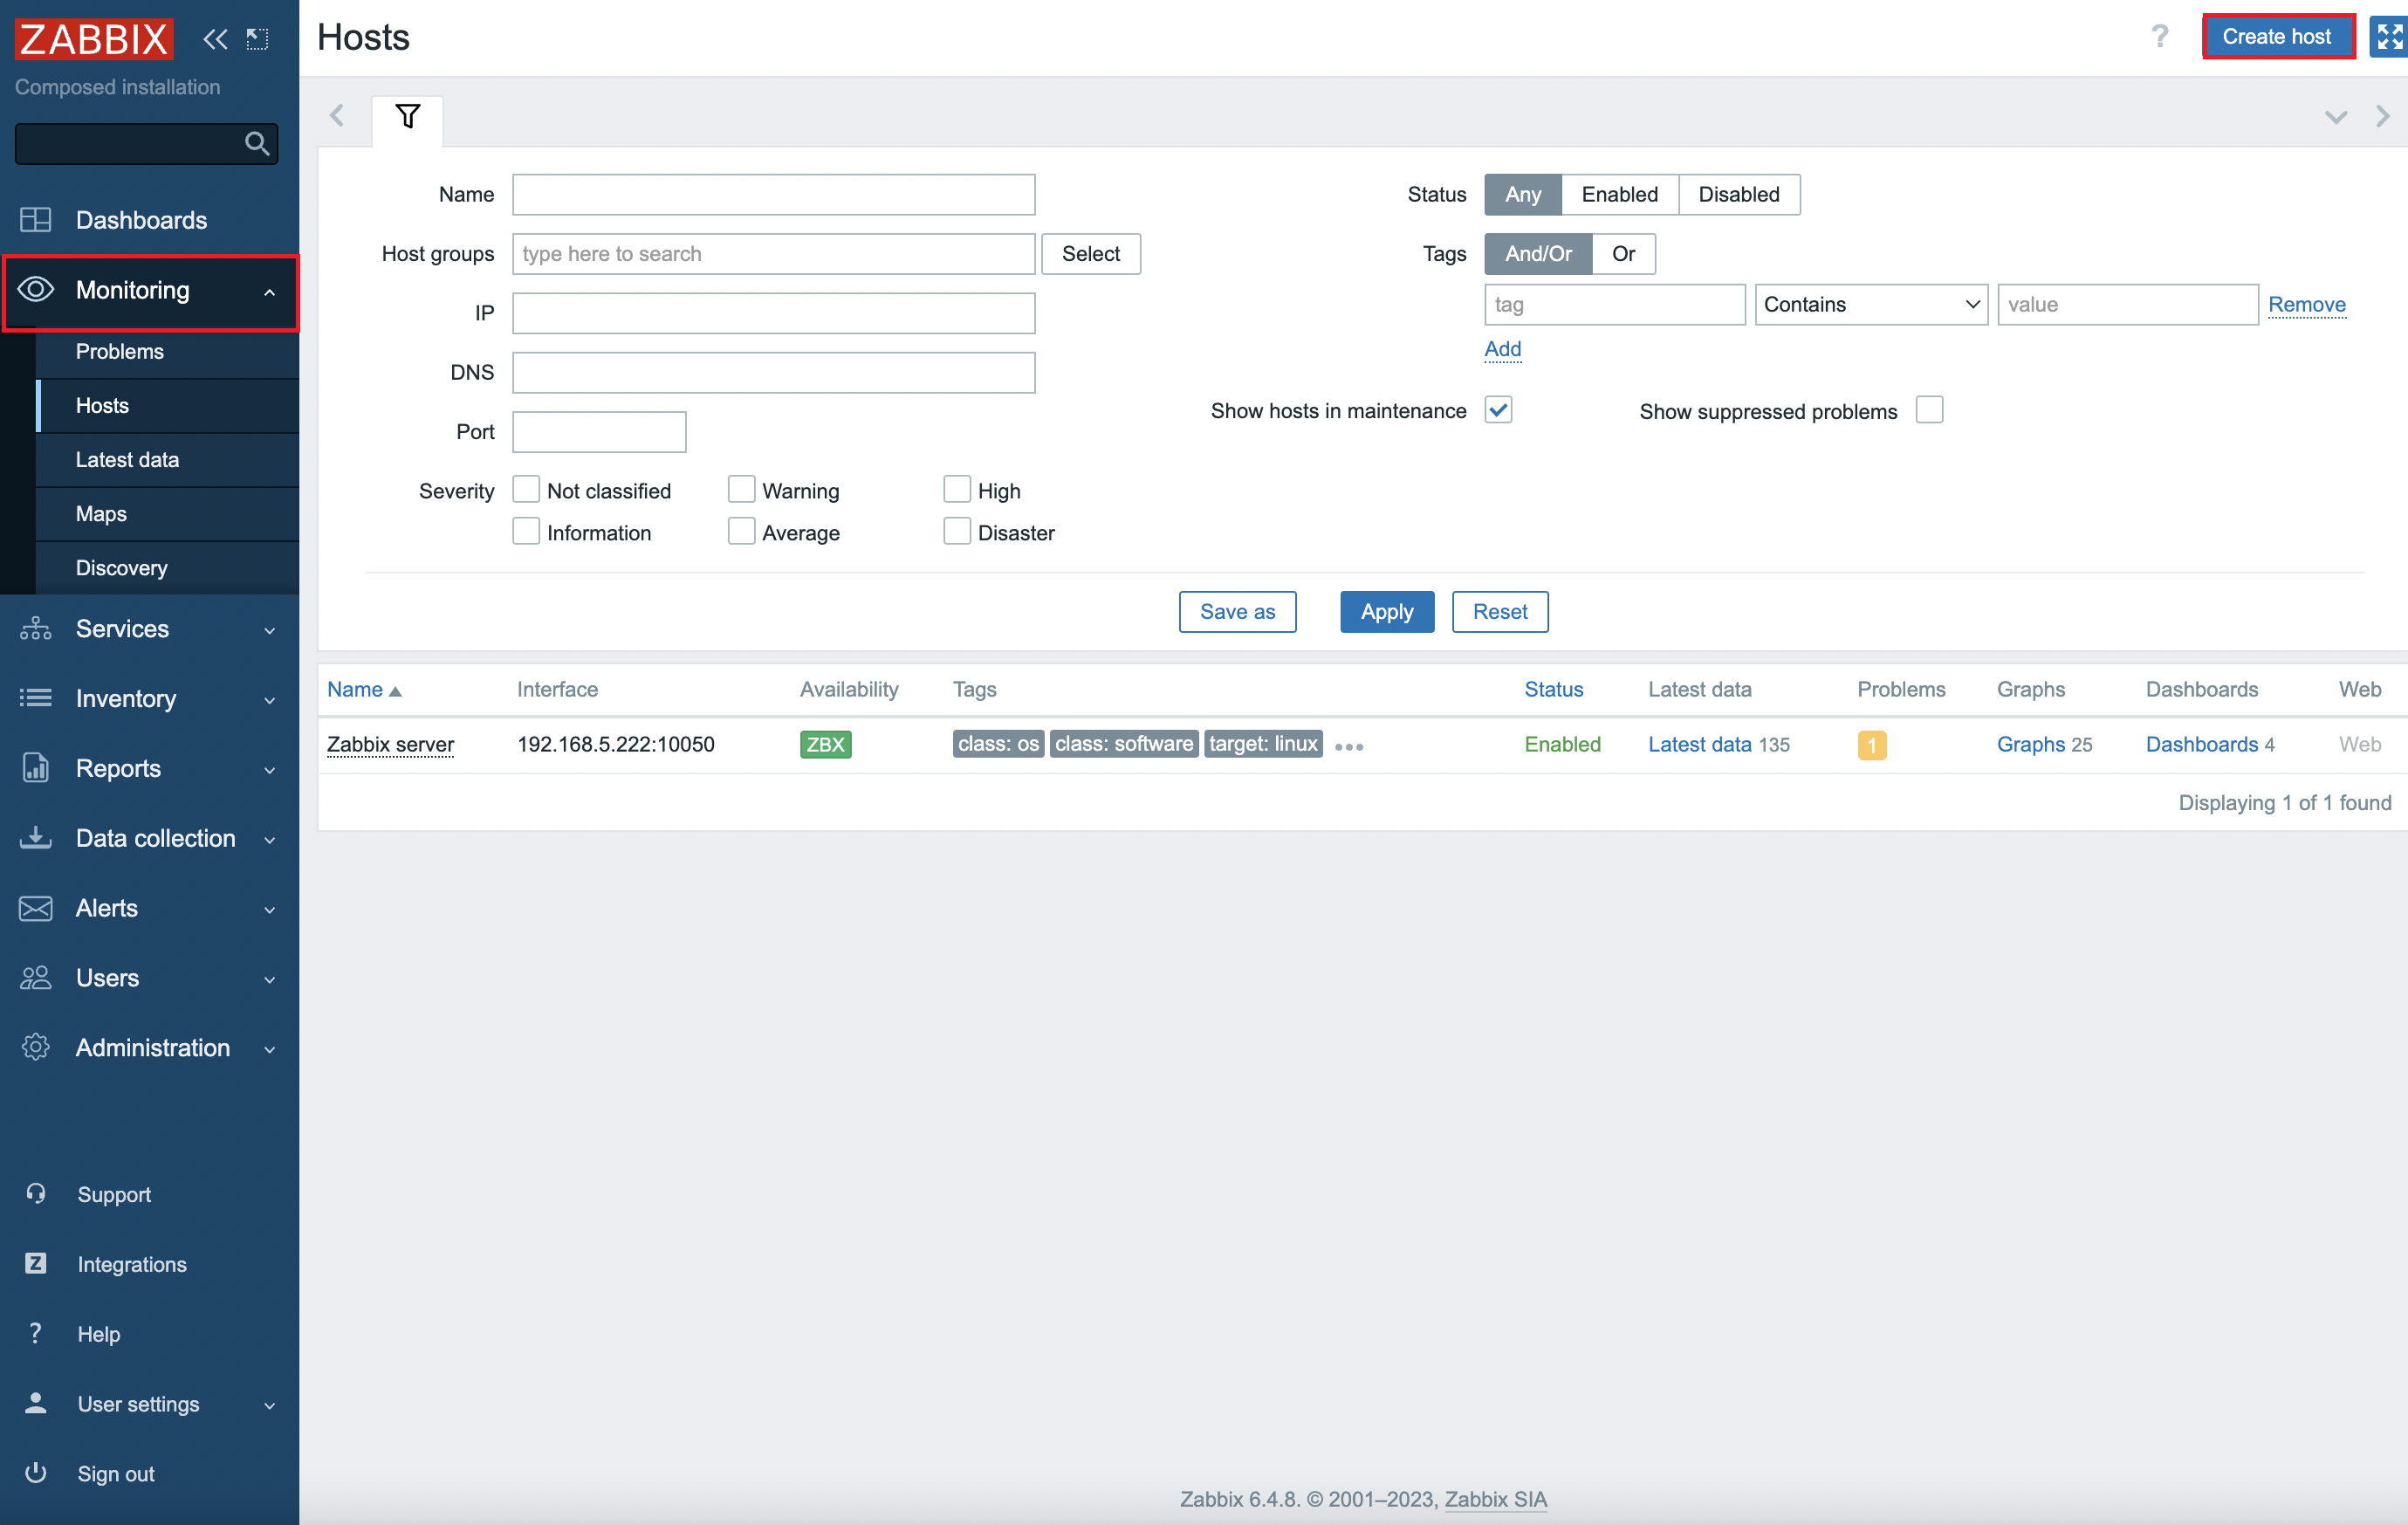
-
Set the following parameters in the opened interface:
-
Host name – host name, for example "Zabbix server"
-
Host groups – host groups; press the Select button and choose Zabbix-servers
-
In the Interfaces section, press the Add button and select Agent
-
Enter the connection details in the IP address, DNS name, Connect to, and Port fields
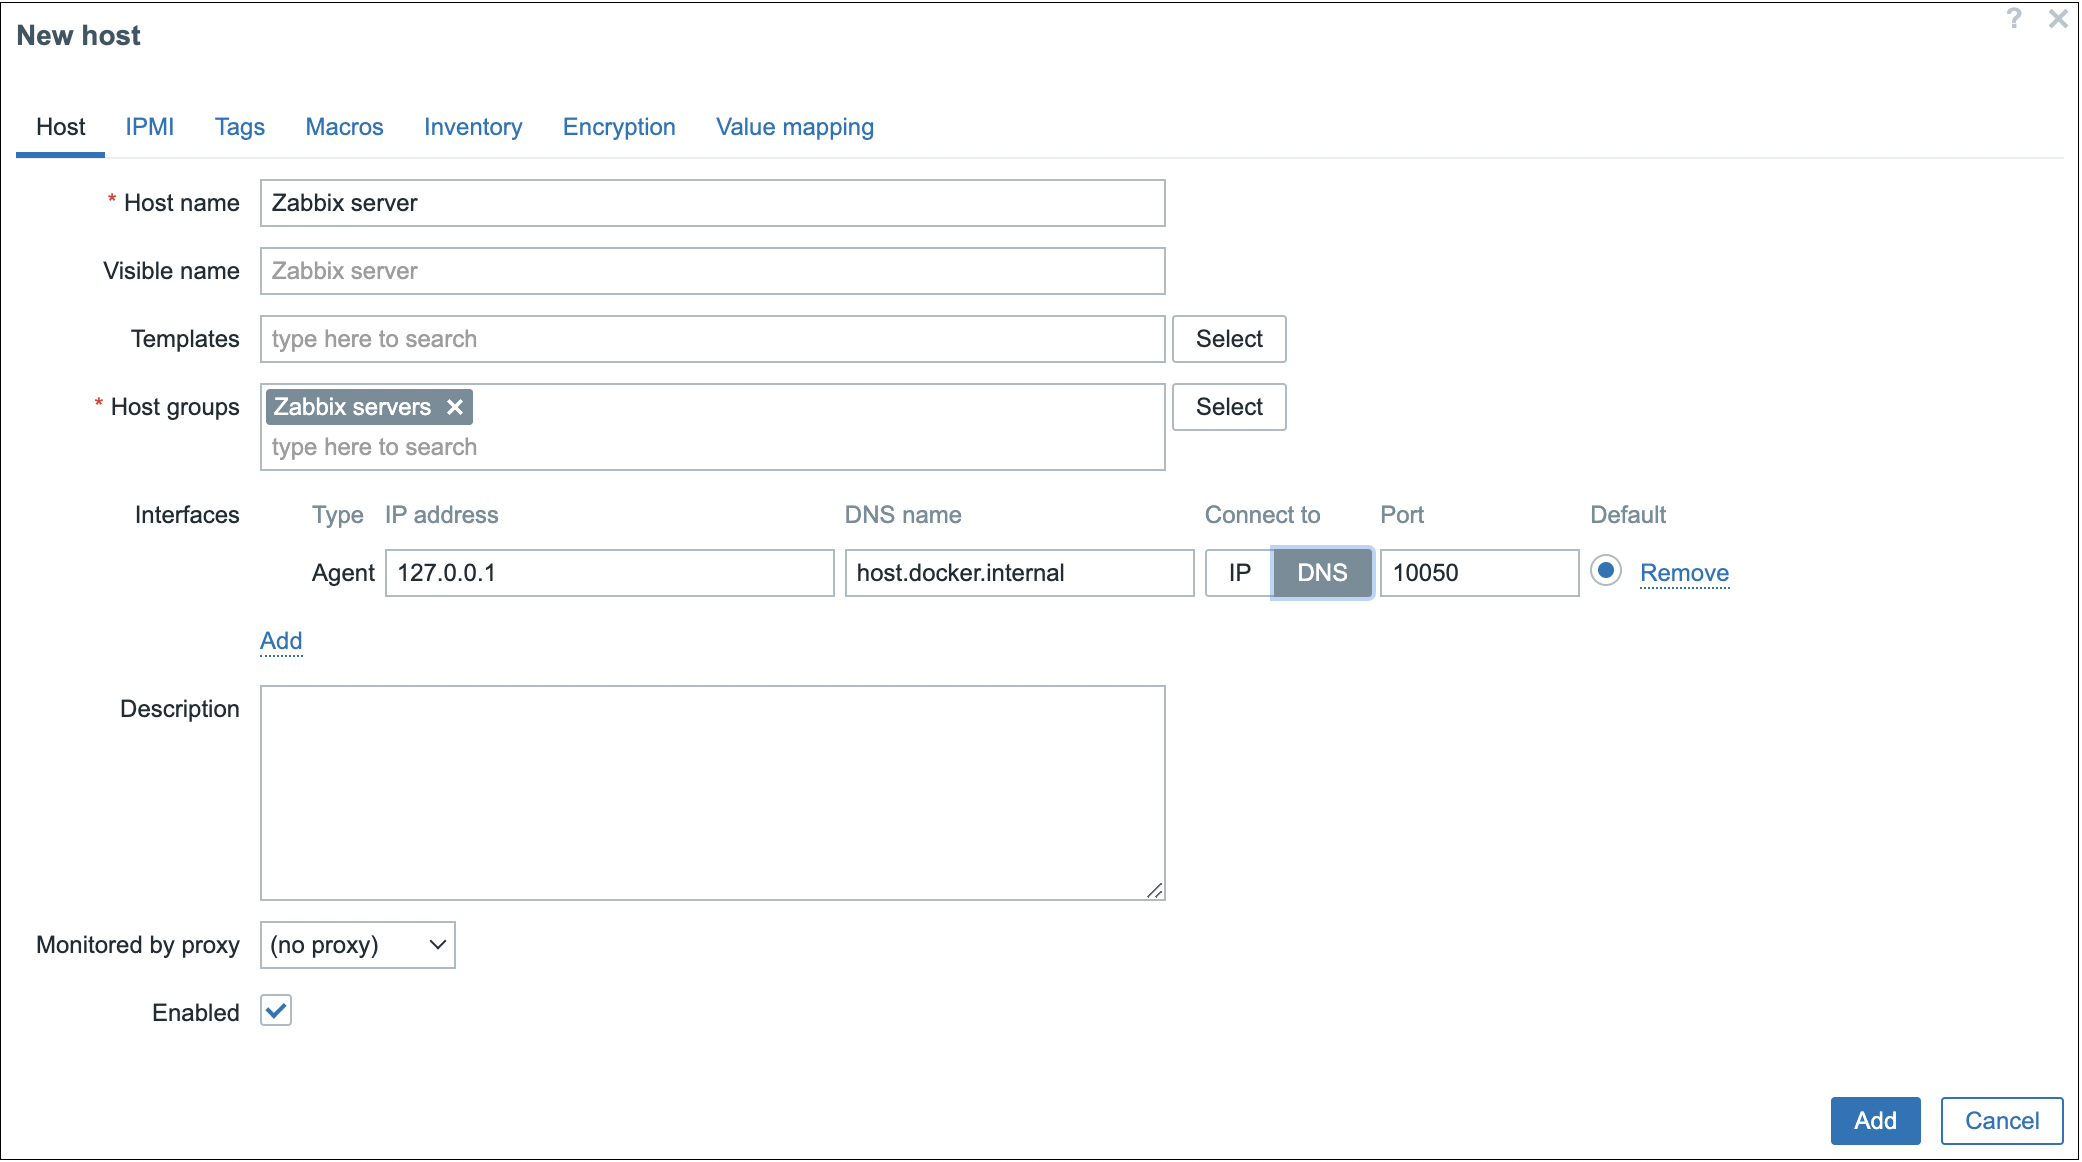
-
-
Press the Add button.
As a result, Zabbix server will receive data from the agent.
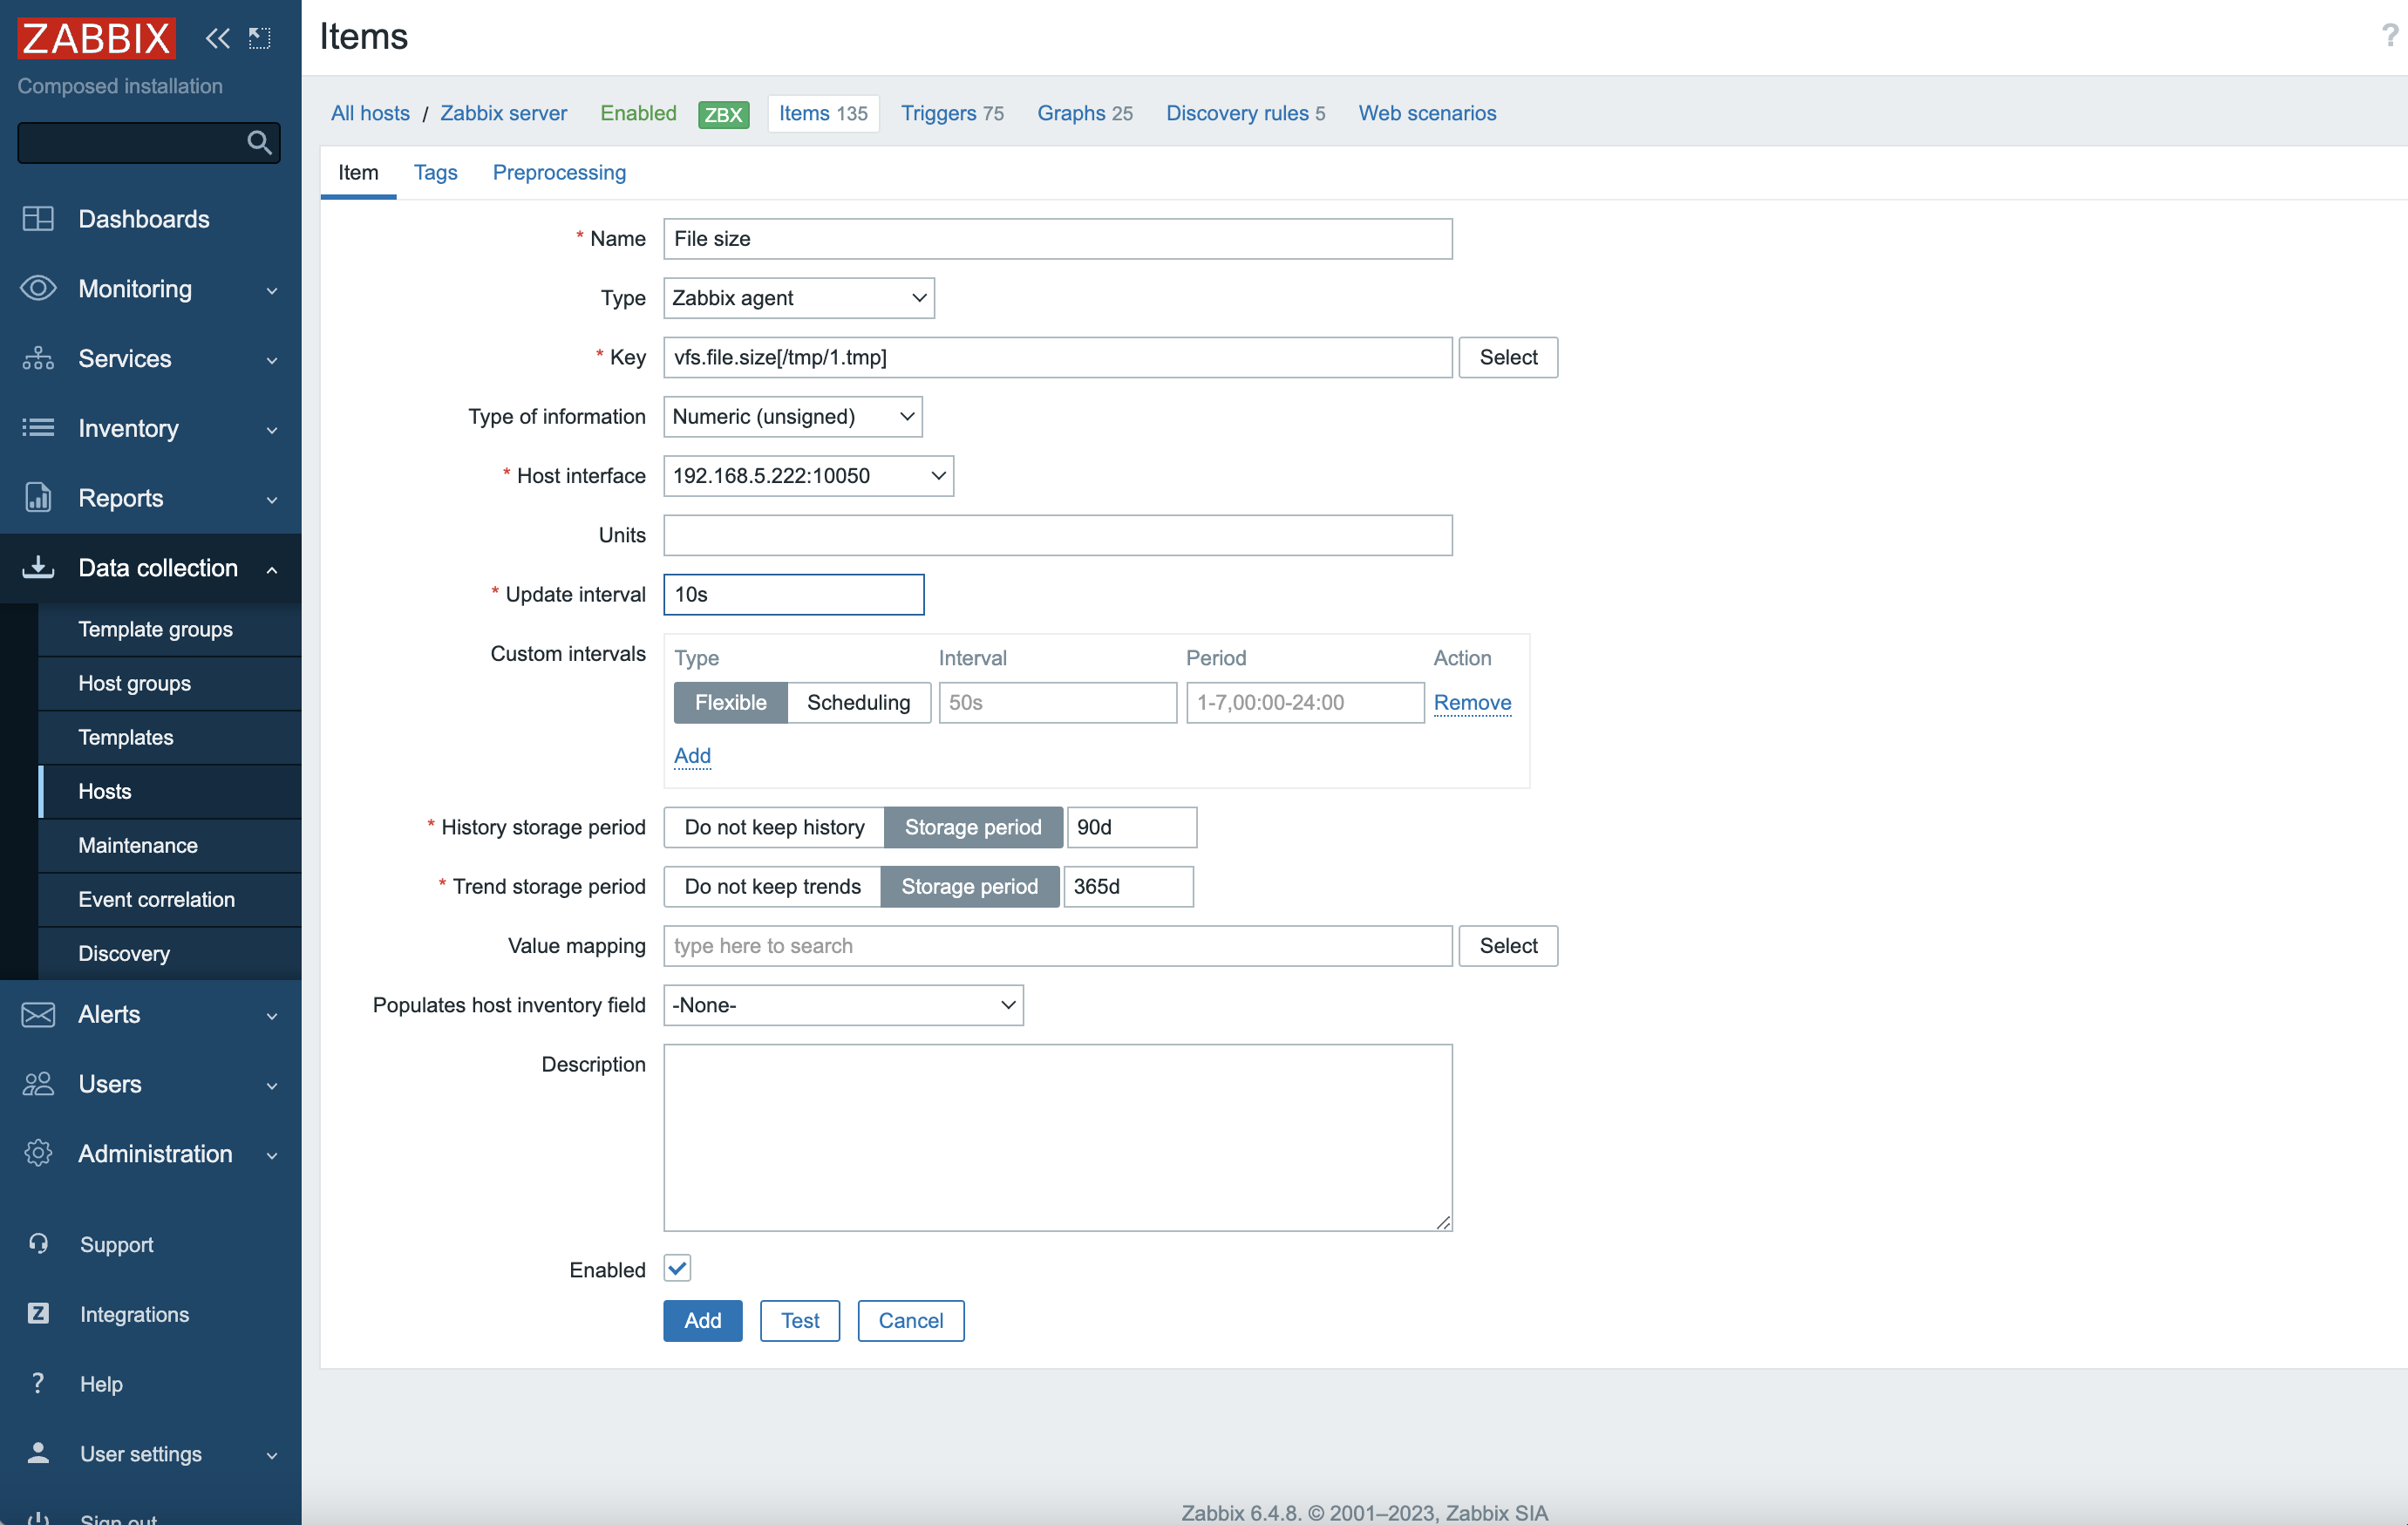
Step 5: create monitoring item
Create a new monitoring item. For this, preform the following steps:
-
Click on the name of the created server and select Items.

-
Press the Create item in the top right corner.
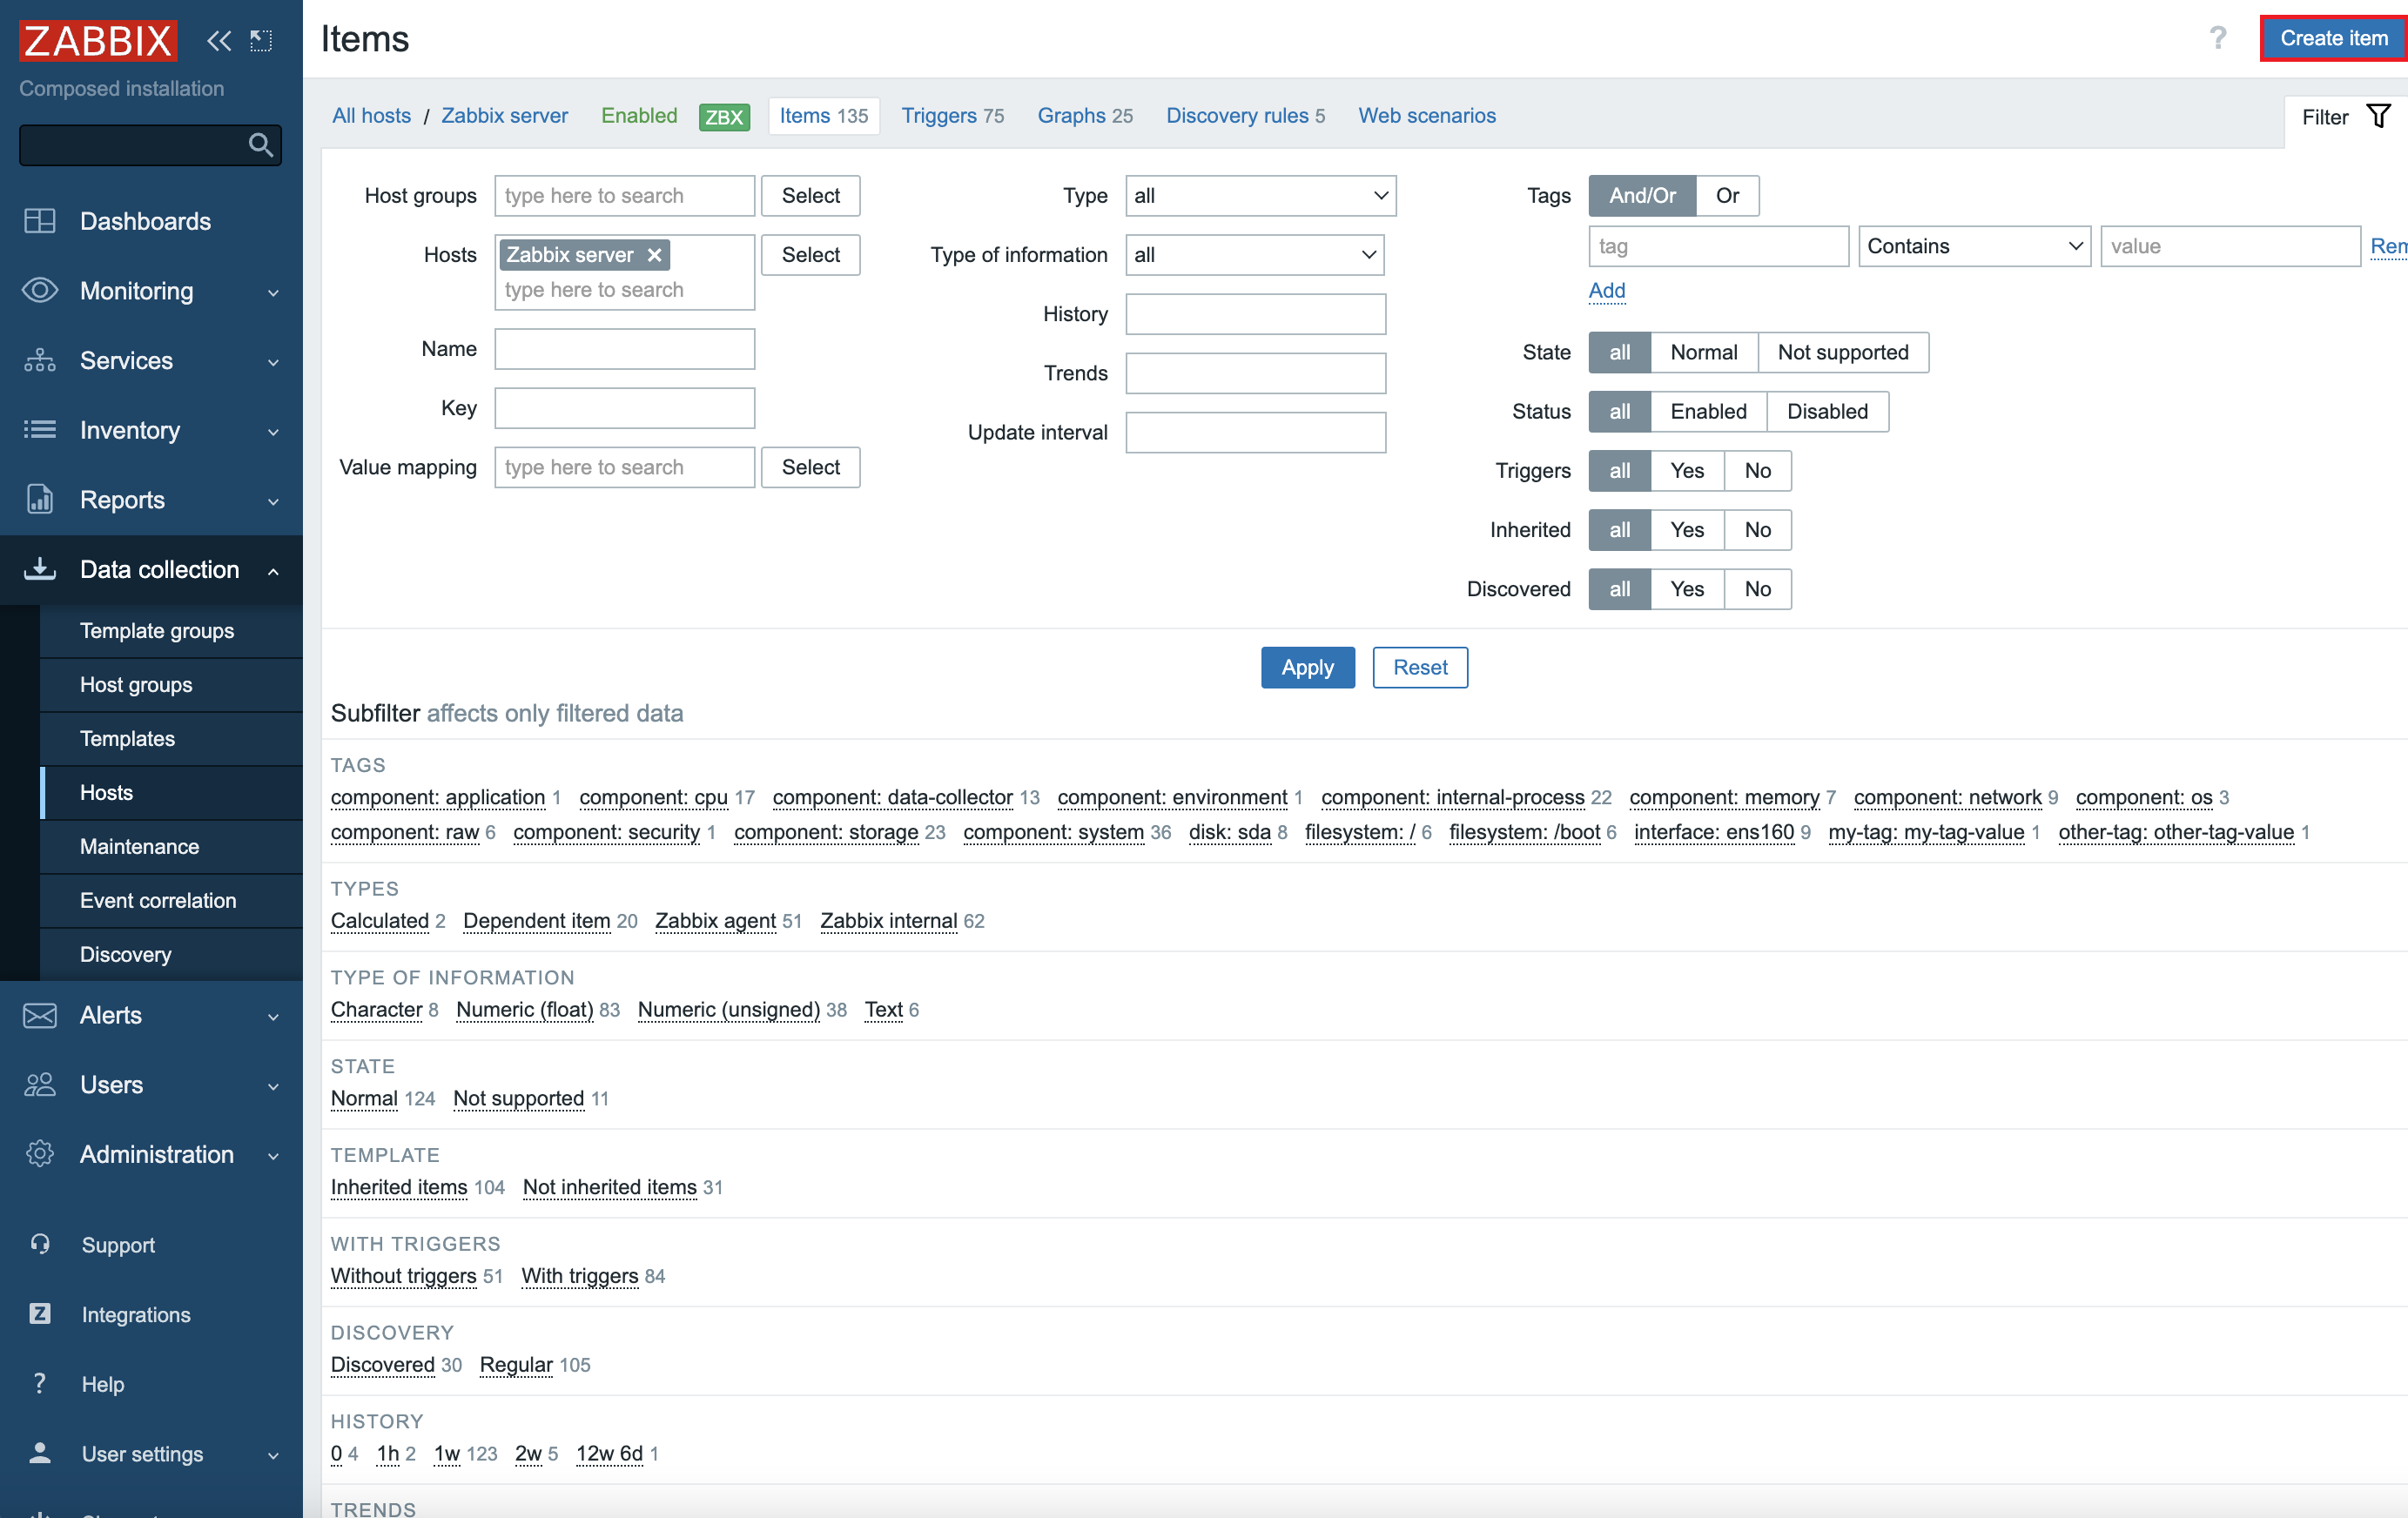
-
Set the necessary item parameters:
-
Switch to the Tags tab, setup item tags and press the Add button.

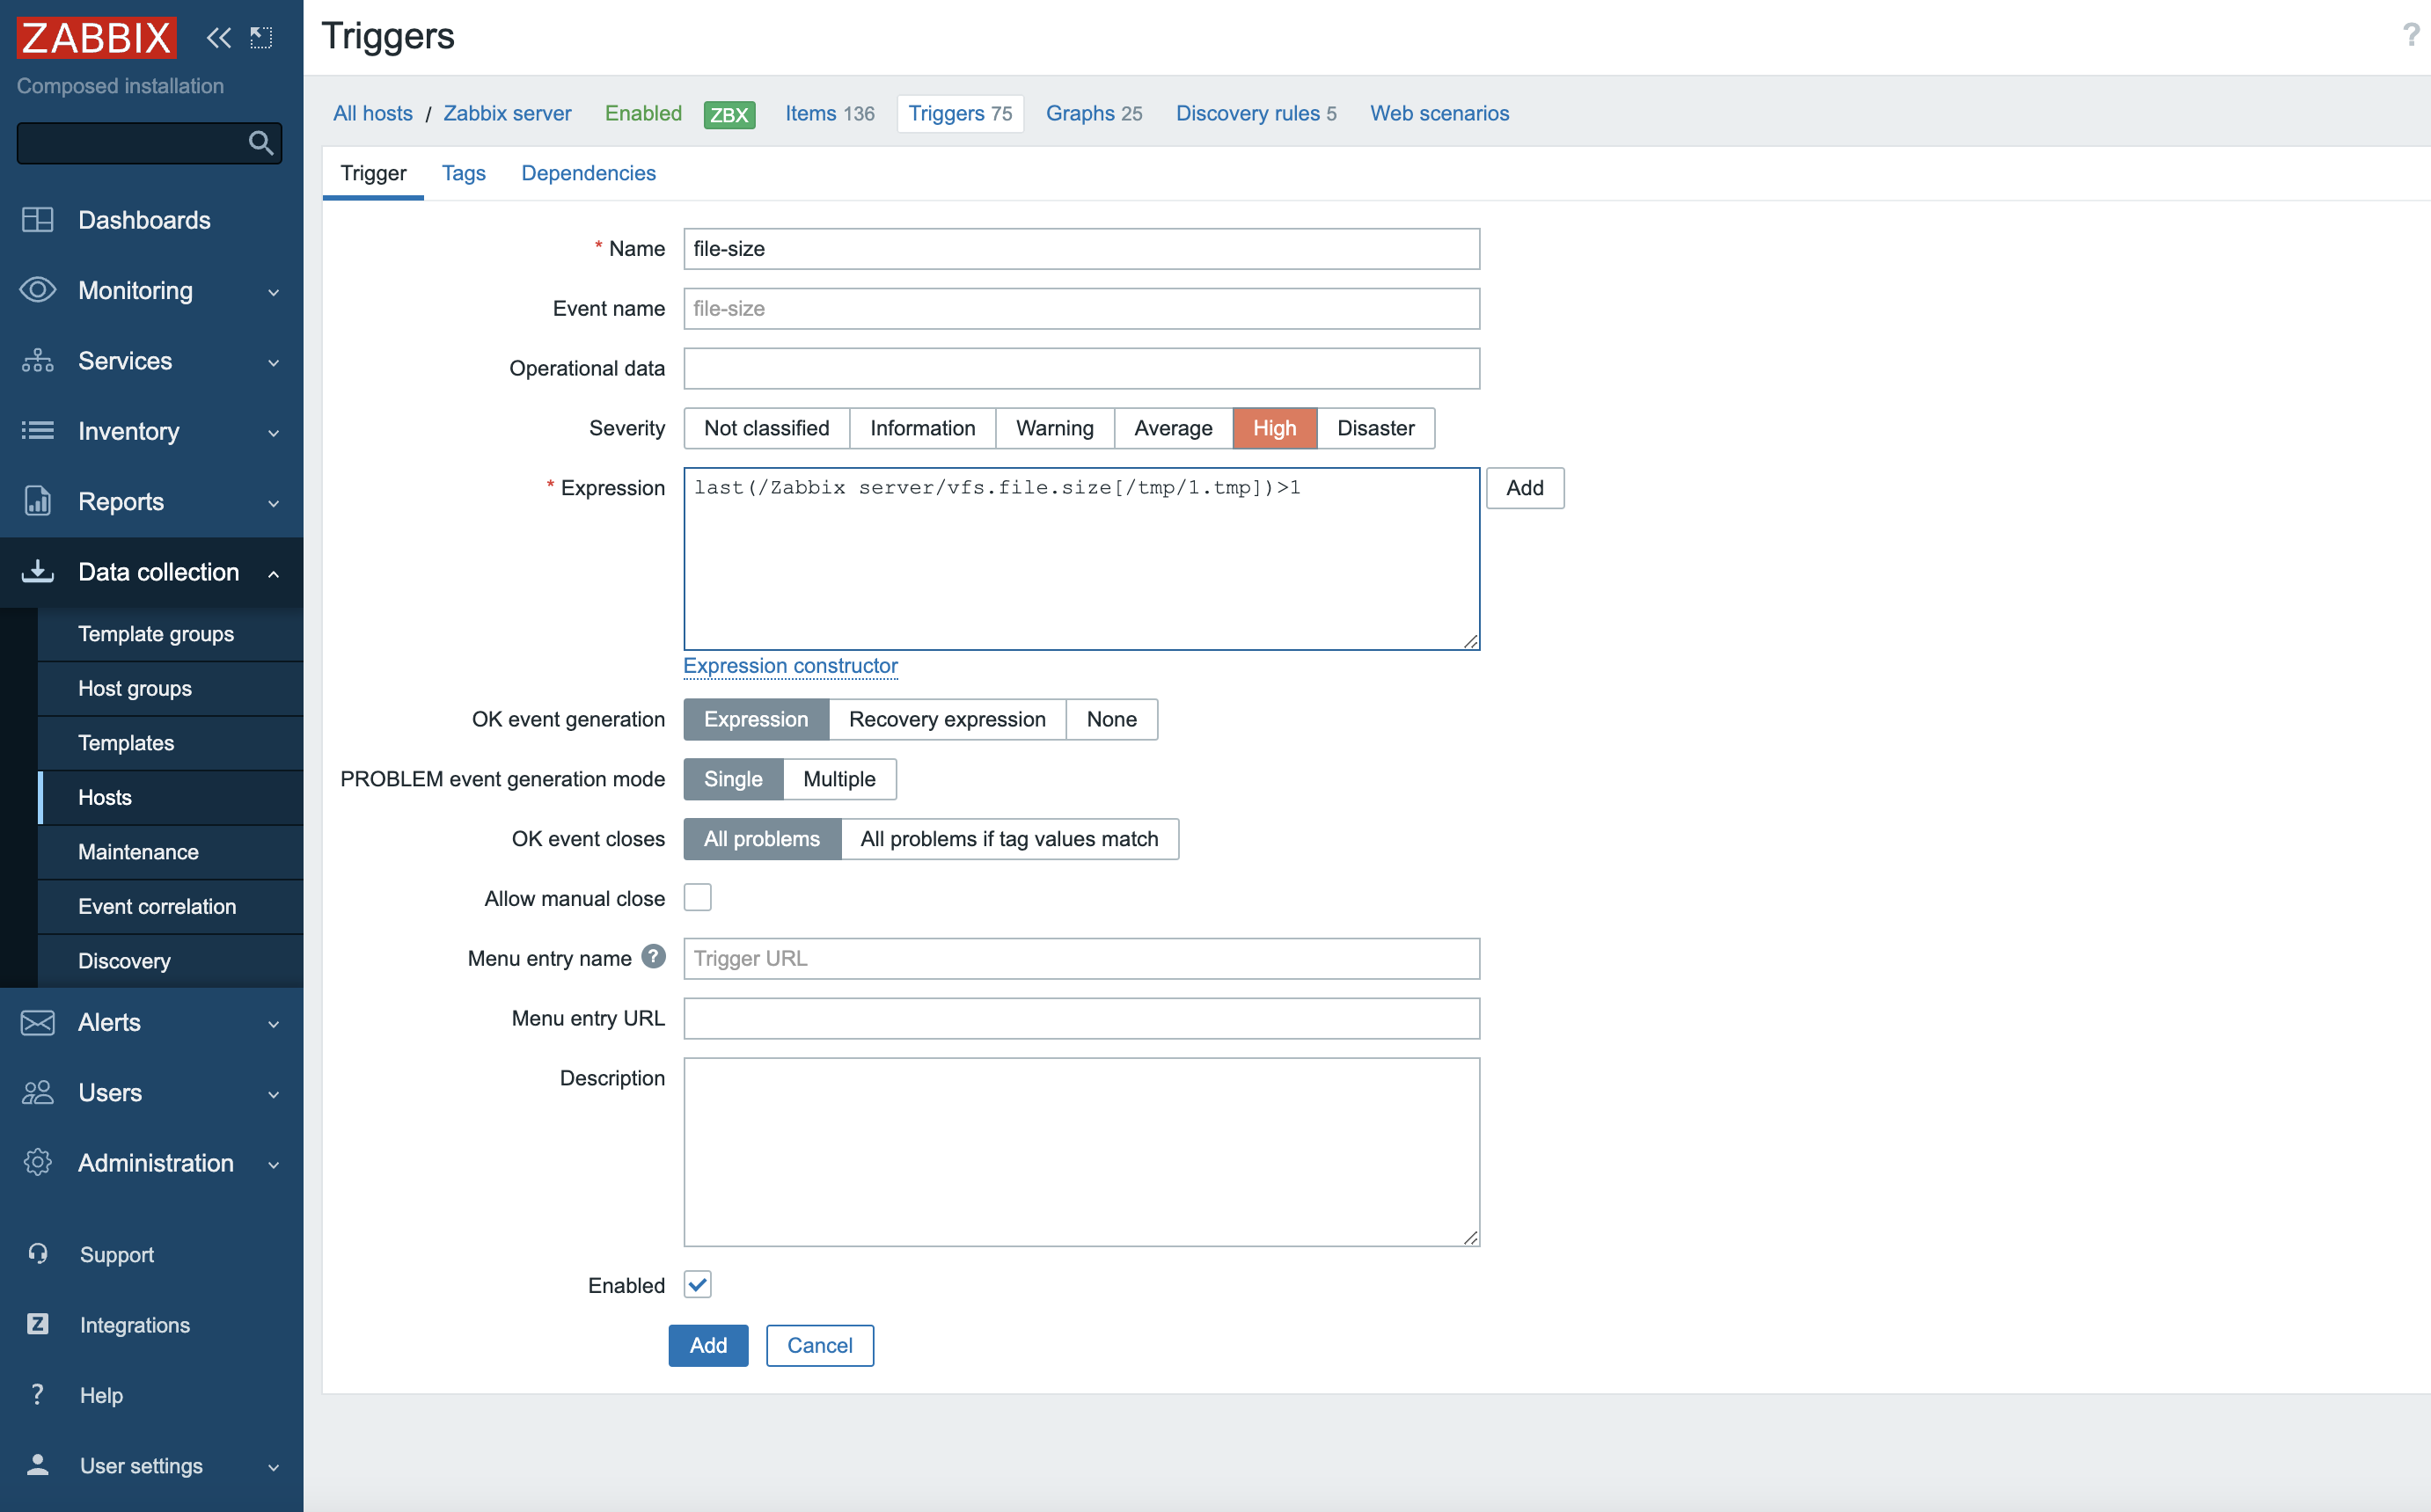
Step 6: create trigger
Switch to the Triggers tab and press the Create trigger button to create a new trigger.
To test the system, create a file size trigger, that will create an alarm when the file size exceeds 1B and press the Add button. If the size of the specified file exceeds 10 bytes, then the alarm with the HIGH severity will be created.
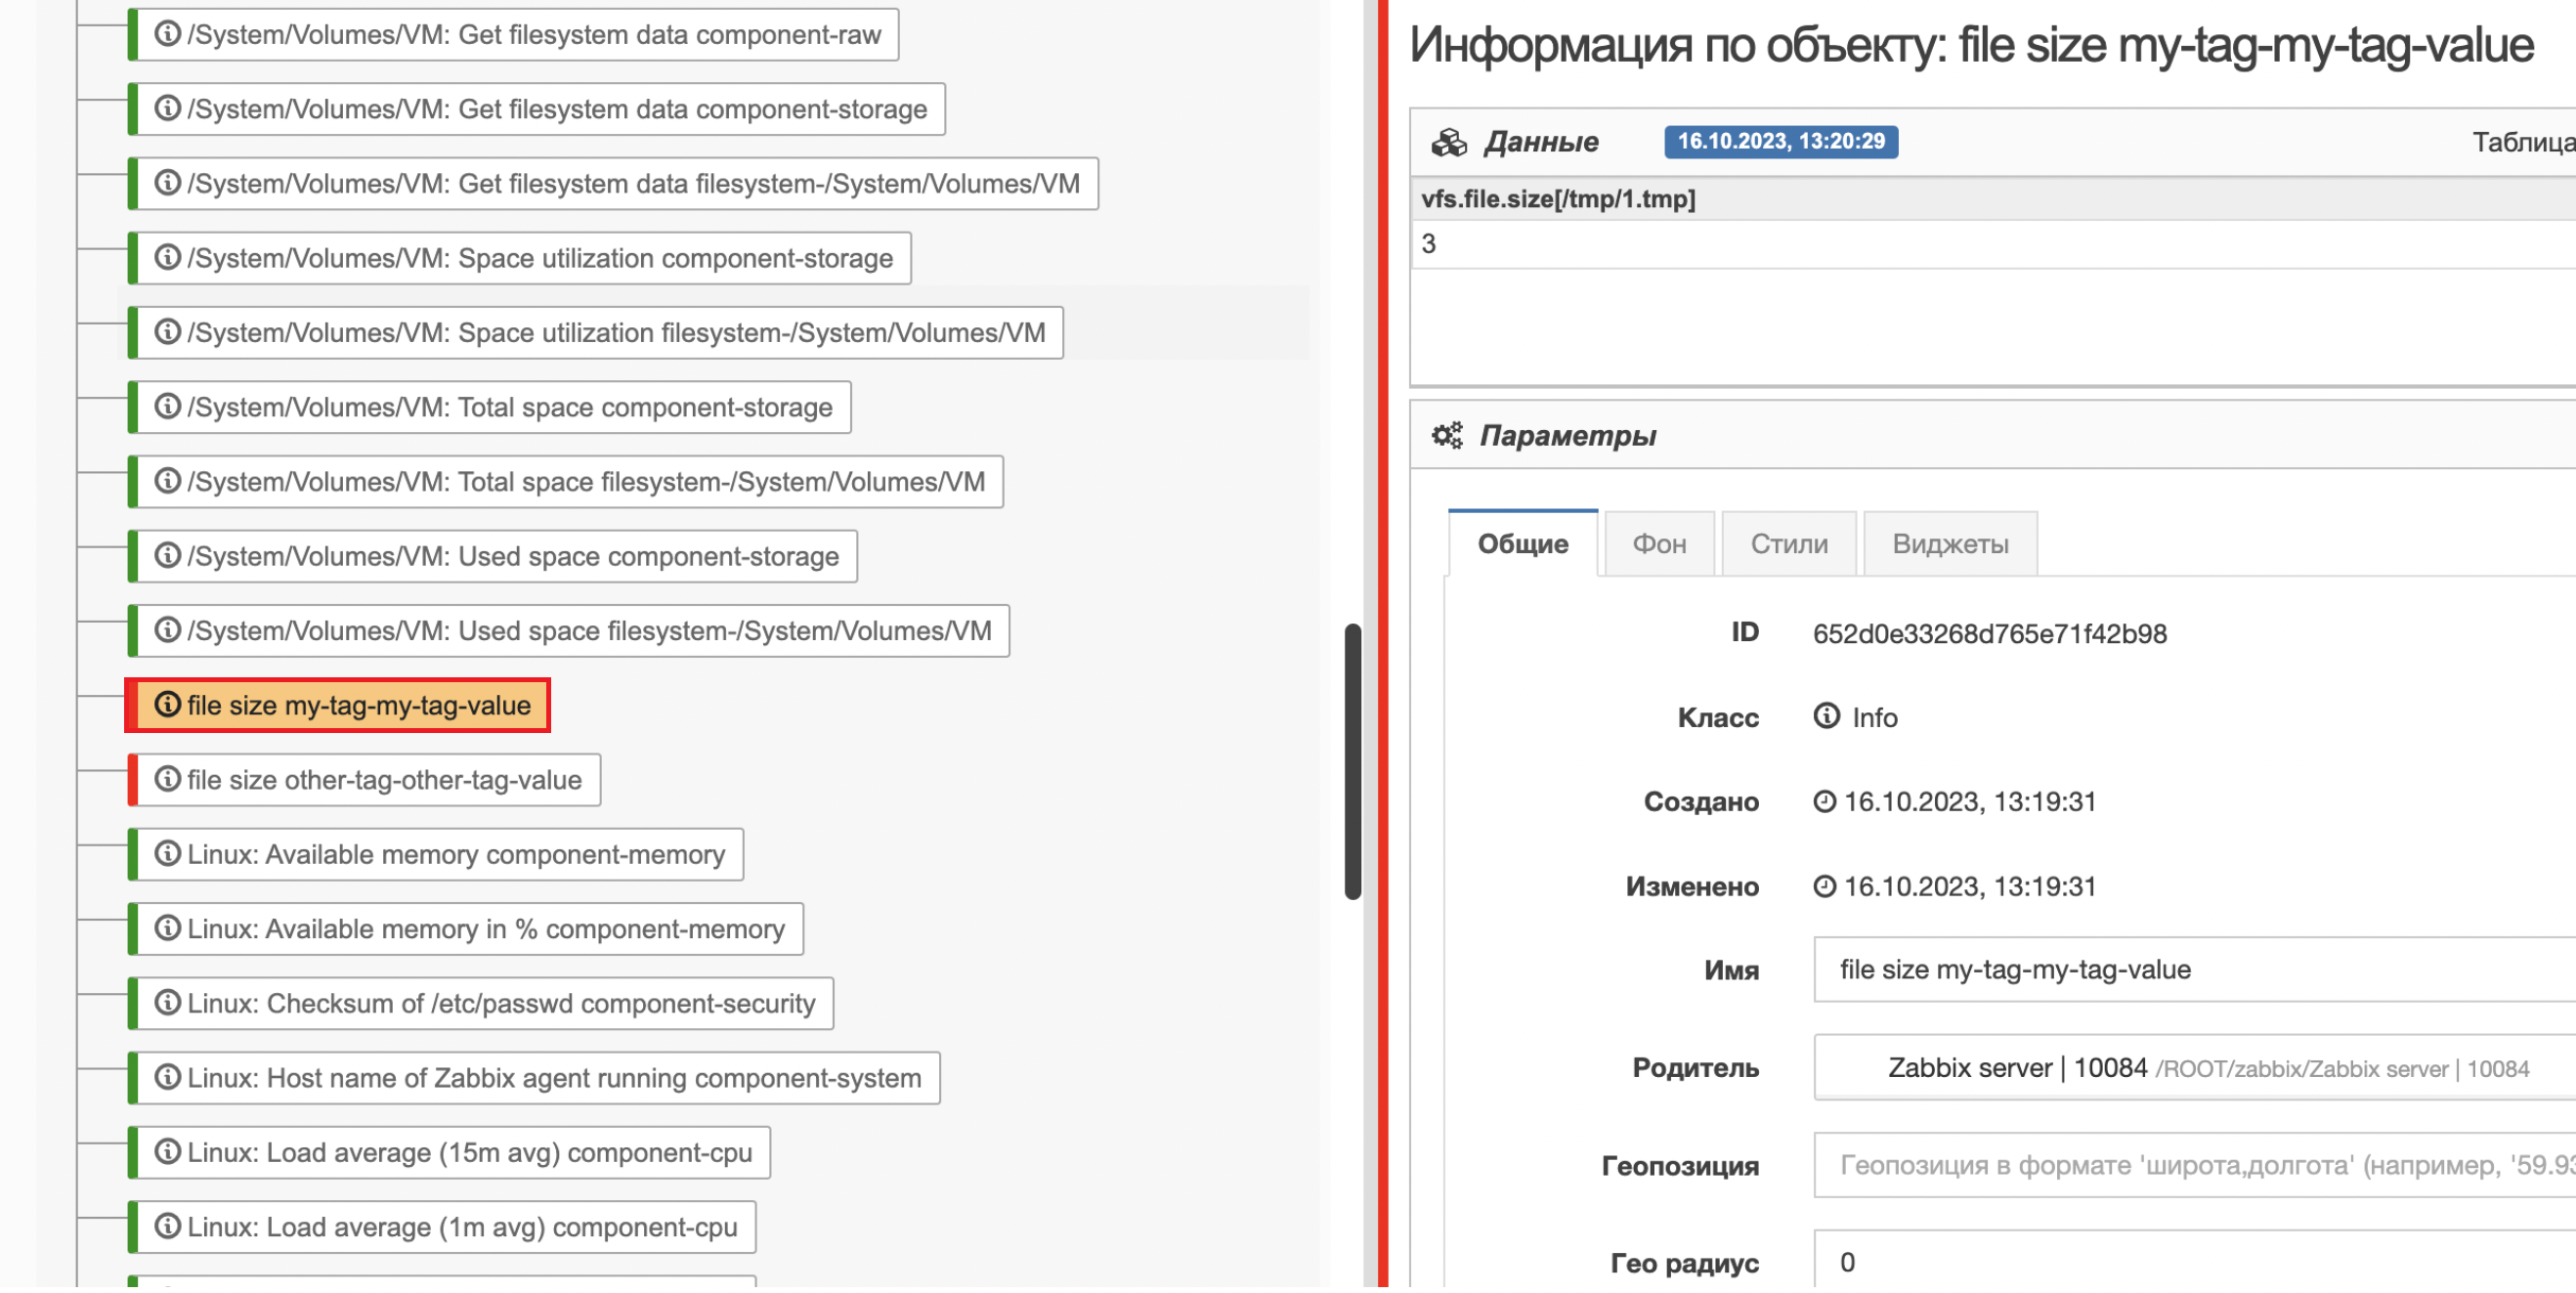
Step 7: setup connection to SAYMON server
To connect SAYMON server to Zabbix server, specify Zabbix server address in the saymon-server.conf and then restart SAYMON server to apply changes (learn more in the Server configuration article).
$sudo service saymon-server restartZabbix host and its child objects will be displayed in the list on objects on the SAYMON server.
Update interval of the data import
By default data on the server is updated every 2 minutes.
To change the update interval, open the
Zabbix section of the server configuration file
/etc/saymon/saymon-server.conf and add the polling_period parameter
with the value of the update interval (in milliseconds). For
example:
"zabbix" : [{
    "url" : "http://192.168.1.215/zabbix/api_jsonrpc.php",
    "user" : "saymon",
    "password" : "saymon_user_password",
    "parent_id" : "58b586d5c3a2f96642e25537",
    "polling_period": 30000
}]
To apply changes, restart the server:
$sudo service saymon-server restartModification of the standard options in Zabbix requests
It is possible to modify options for the requests for
-
hosts,
-
triggers,
-
data
"zabbix" : [{
...
       "request_options": {
          "hosts": {
            "filter":  {
               ...
            }
          },
          "triggers": {
            "filter": {
                ...
             }
           },
           "data": {
            "filter": {
                ...
             }
           }
        }
...
}]|
In order to remove the filter from the request option, set the null value to the parameter filter. Example (remove the filter field from the triggers request options of Zabbix): |
Mapping Zabbix metrics to the object classes
By default the INFO class is assigned to the discovered objects. In
order to assign another class to the new objects, it is necessary to set
the zabbix.classes dict and specify correspondences between
class IDs and Zabbix objects' names:
"zabbix": [{
...
        "classes": {
            "4": "CPU",
            "619503be0ffb595aebe22222": "Memory|General"
         },
...
}]|
The order of the rules applying is not guaranteed. If the same regular expressions are assigned to two different classes or the expression "*" (any text) has been used, then in cannot be guaranteed that the rule which is higher in the list will be applied first. |
This mapping is set up individually for each Zabbix connection. Regular expressions in values (object names) are not case sensitive.
| If the single class needs to be connected to several Zabbix names it is possible to set all of the names in one regular expression using the OR operator. Otherwise only one correspondence will be applied. |